[AutoLayout] 4. customView with IBDesignable and IBInspectable, CALayer
1. 코드 방식
import UIKit

class Autolayout4ViewController: UIViewController {

    @IBOutlet weak var yellowView: UIView!

    // viewController가 생성되어 메모리에 올라가면 호출됨
    override func viewDidLoad() {
        super.viewDidLoad()
        self.yellowView.layer.cornerRadius = 20
    }
}

#Preview {
    Autolayout4ViewController()
}
2. @IBInspectable 방식
- 이 방식은 deprecated되었다.
// storyboard에서 네모View 클릭 후 option + command + 4 눌러서 class를 CustomView로 바꿔준다
// storyboard에서 네모View 클릭 후 option + command + 5 누르면 Corner radius가 생긴다
import UIKit
// @IBDesignable: 인터페이스 빌더에서 디자인으로 확인 가능해짐
@IBDesignable
class CustomView: UIView {
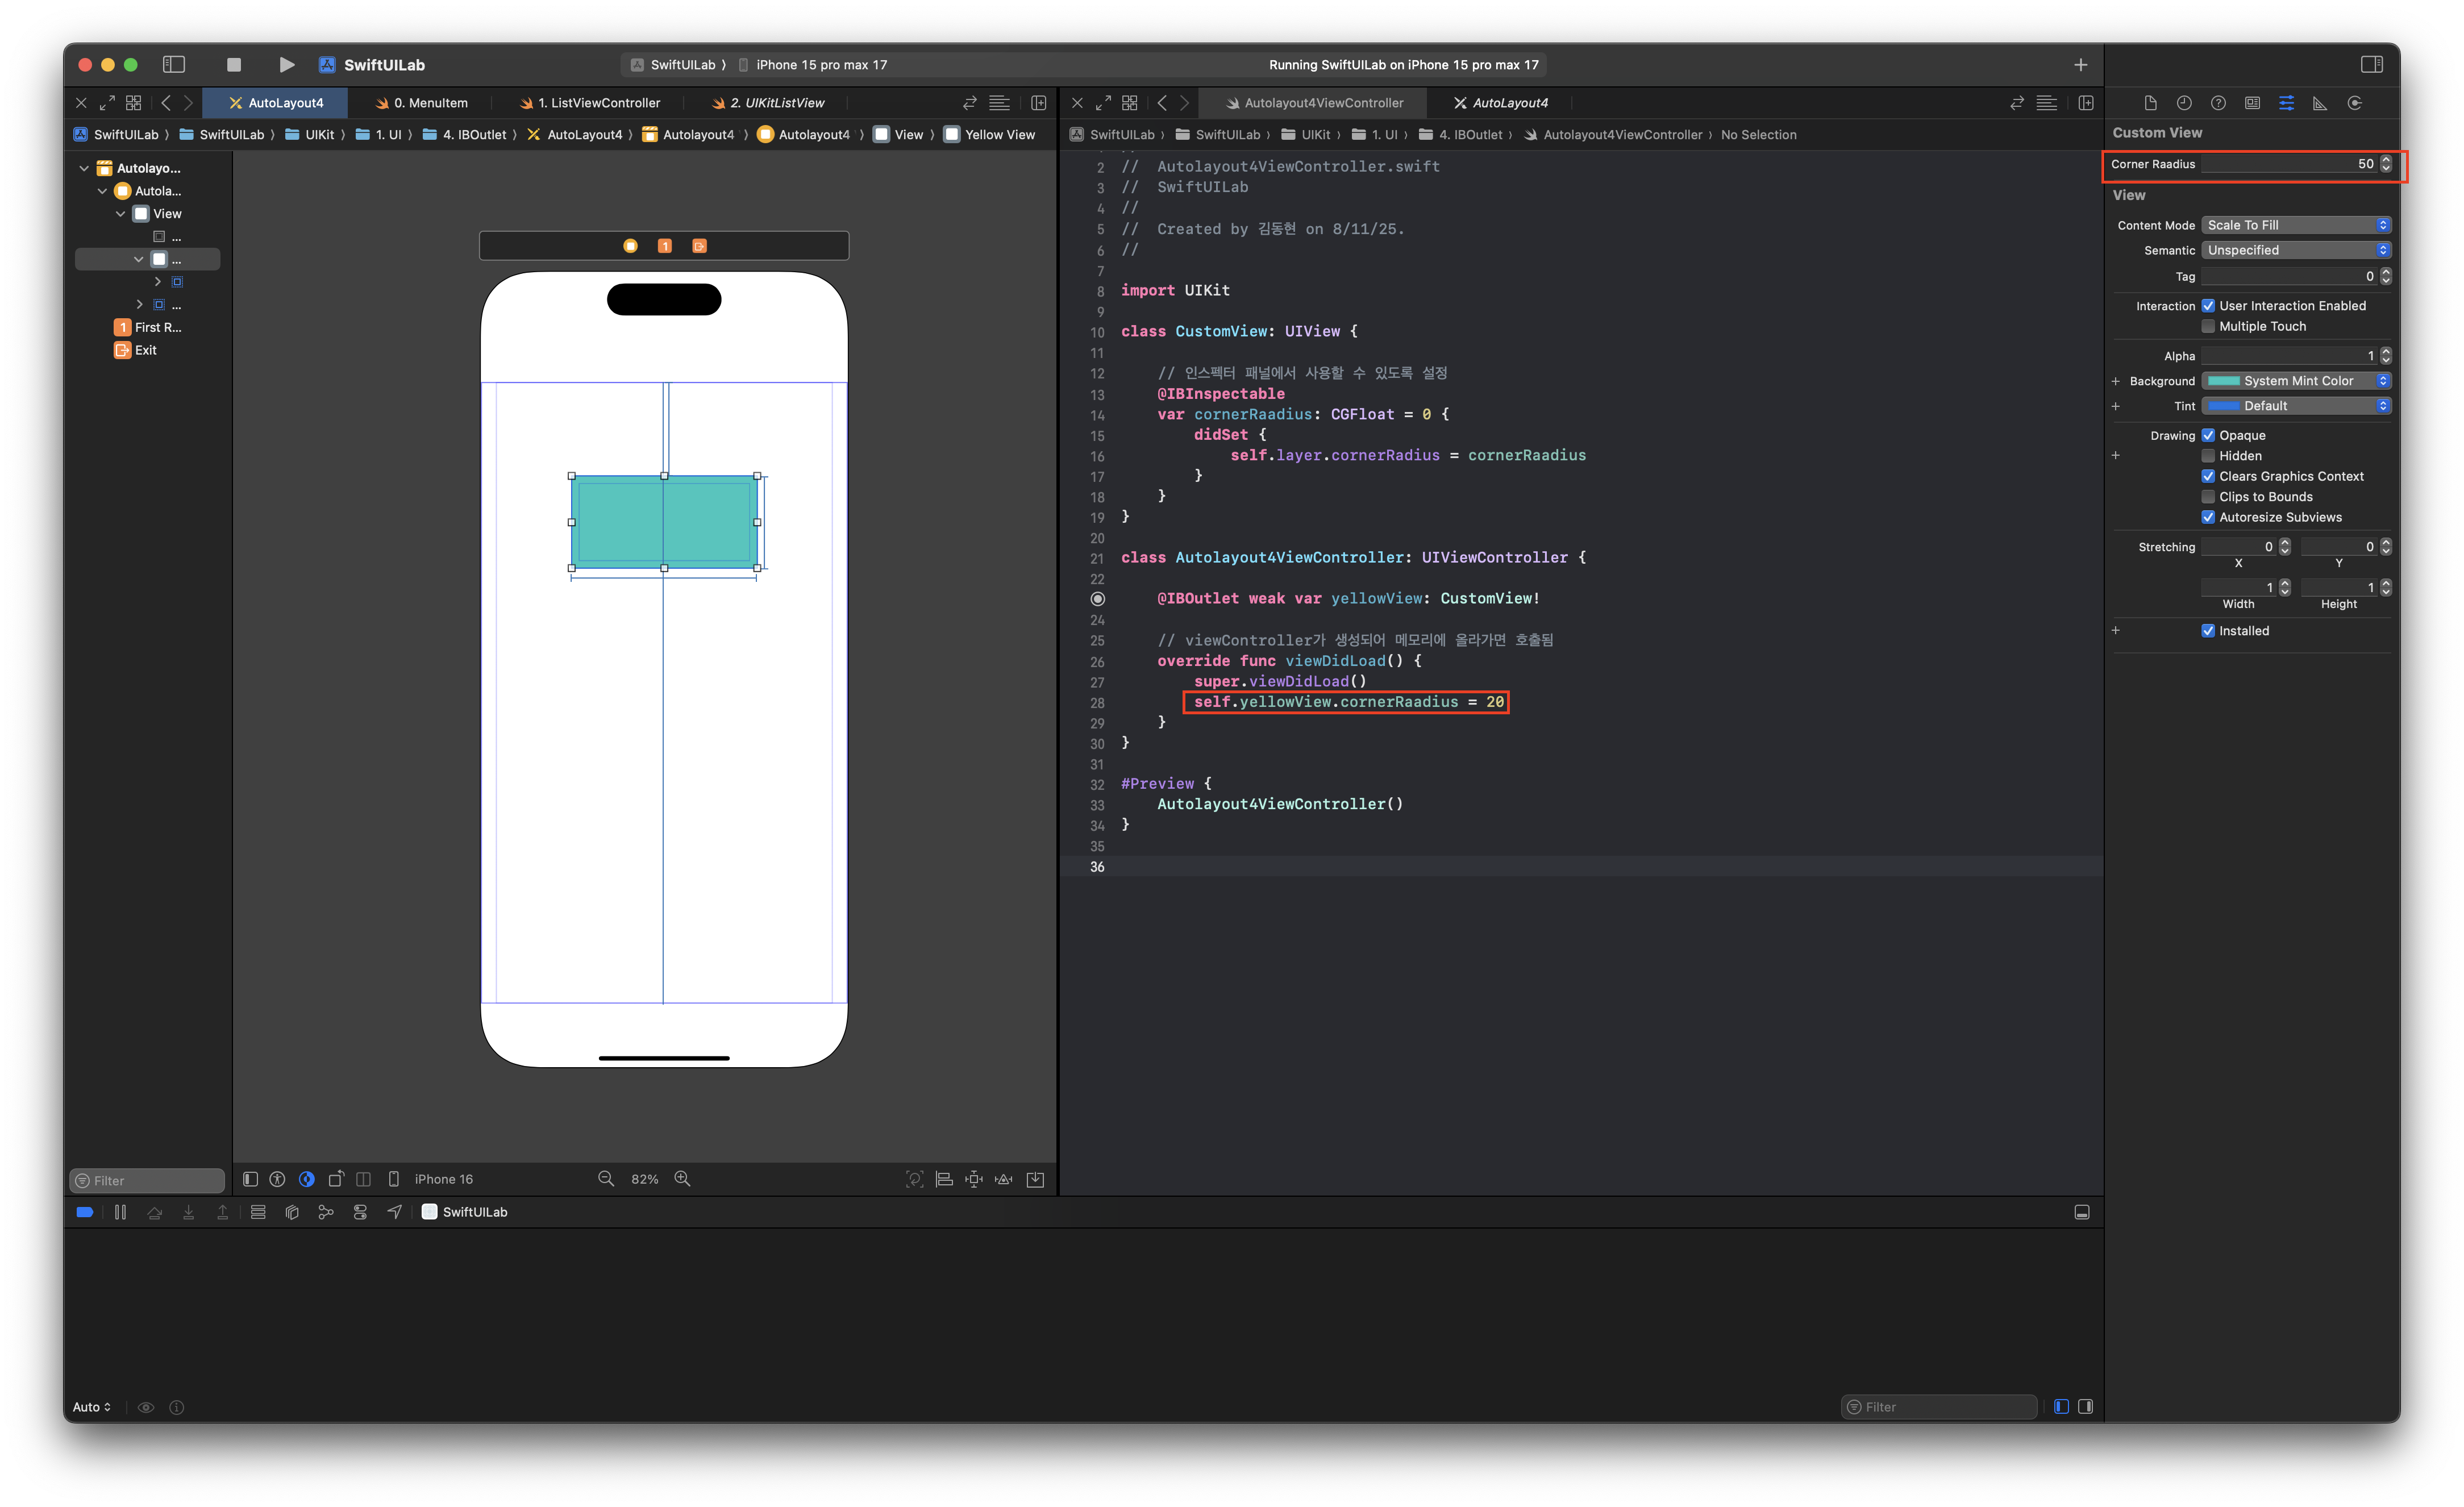
// @IBInspectable: 인스펙터 패널에서 사용할 수 있도록 설정
@IBInspectable
var cornerRaadius: CGFloat = 0 {
didSet {
self.layer.cornerRadius = cornerRaadius
}
}
}
class Autolayout4ViewController: UIViewController {
@IBOutlet weak var yellowView: CustomView!
// viewController가 생성되어 메모리에 올라가면 호출됨
override func viewDidLoad() {
super.viewDidLoad()
self.yellowView.cornerRaadius = 20
}
}
#Preview {
Autolayout4ViewController()
}
3. 최종코드
import UIKit

// @IBDesignable: 인터페이스 빌더에서 디자인으로 확인 가능해짐
@IBDesignable
class CustomView: UIView {

    // @IBInspectable: 인스펙터 패널에서 사용할 수 있도록 설정
    @IBInspectable
    var cornerRaadius: CGFloat = 0 {
        didSet {
            self.layer.cornerRadius = cornerRaadius
        }
    }
}

class Autolayout4ViewController: UIViewController {

    @IBOutlet weak var yellowView: CustomView!

    // viewController가 생성되어 메모리에 올라가면 호출됨
    override func viewDidLoad() {
        super.viewDidLoad()
        self.yellowView.cornerRaadius = 20
    }
}

// 스토리보드에서 VC의 Storyboard ID를 클래스명과 동일하게 설정했다고 가정
//   - Storyboard 파일명: "AutoLayout4"
//   - Storyboard ID: "Autolayout4ViewController"
#Preview("AutoLayout4 (Storyboard VC)") {
    // 미리보기에서 종종 Bundle.main 대신 타입 기반 번들이 더 안전합니다

    // bundle: 스토리보드, 이미지, nib, JSON 등을 묶어 관리하는 타입
    // 스토리보드 리소스를 찾을 번들을 지정
    let bundle = Bundle(for: Autolayout4ViewController.self)
    let sb = UIStoryboard(name: "AutoLayout4", bundle: bundle) // 스토리보드 파일 로드
    let vc = sb.instantiateViewController(withIdentifier: "Autolayout4ViewController")
    return vc
}
4. 전체 코드
import UIKit

// @IBDesignable: 인터페이스 빌더에서 디자인으로 확인 가능해짐
@IBDesignable
class CustomView: UIView {

    /// 정사각형 여부
    /// - Returns: 여부
    private var isSquare: Bool {
        // get
        return self.frame.width == self.frame.height
    }

    // @IBInspectable: 인스펙터 패널에서 사용할 수 있도록 설정
    @IBInspectable
    var cornerRaadius: CGFloat = 0 {
        didSet {
            self.layer.cornerRadius = cornerRaadius
        }
    }

    // 가장자리 두꼐
    @IBInspectable
    var borderWidth: CGFloat = 0 {
        didSet {
            self.layer.borderWidth = borderWidth
        }
    }

    // 색상
    @IBInspectable
    var borderColor: UIColor = UIColor.clear {
        didSet {
            self.layer.borderColor = borderColor.cgColor
        }
    }

    // 동그라미 뷰
    @IBInspectable
    var isCircle: Bool = false {
        didSet {
            // 정사각형이면서 isCircle이 true라면?
            if isSquare && isCircle {
                self.layer.cornerRadius = self.frame.width / 2
            }
        }
    }

    // 그림자
    @IBInspectable
    var hasShadow: Bool = false {
        didSet {
            if hasShadow {
                self.layer.applyShadow()
            }
        }
    }
}

extension CALayer {

    /// 뷰에 그림자 적용
    /// - Parameters:
    ///   - color: 그림자 색
    ///   - alpha: 투명도
    ///   - x: 가로 위치
    ///   - y: 세로 위치
    ///   - blur: 블러
    ///   - spread: 퍼짐 정도
    func applyShadow(
        color: UIColor = .black,
        alpha: Float = 0.5,
        x: CGFloat = 0,
        y: CGFloat = 20,
        blur: CGFloat = 35,
        spread: CGFloat = 0)
    {
        masksToBounds = false
        shadowColor = color.cgColor
        shadowOpacity = alpha
        shadowOffset = CGSize(width: x, height: y)
        shadowRadius = blur / 2.0
        if spread == 0 {
            shadowPath = nil
        } else {
            let dx = -spread
            let rect = bounds.insetBy(dx: dx, dy: dx)
            shadowPath = UIBezierPath(rect: rect).cgPath
        }
    }
}

class Autolayout4ViewController: UIViewController {

    @IBOutlet weak var yellowView: CustomView!

    // viewController가 생성되어 메모리에 올라가면 호출됨
    override func viewDidLoad() {
        super.viewDidLoad()
        self.yellowView.cornerRaadius = 20
        self.yellowView.borderWidth = 10
        self.yellowView.borderColor = .blue
        self.yellowView.isCircle = true
        self.yellowView.hasShadow = true
    }
}

// 스토리보드에서 VC의 Storyboard ID를 클래스명과 동일하게 설정했다고 가정
//   - Storyboard 파일명: "AutoLayout4"
//   - Storyboard ID: "Autolayout4ViewController"
#Preview("AutoLayout4 (Storyboard VC)") {
    // 미리보기에서 종종 Bundle.main 대신 타입 기반 번들이 더 안전합니다

    // bundle: 스토리보드, 이미지, nib, JSON 등을 묶어 관리하는 타입
    // 스토리보드 리소스를 찾을 번들을 지정
    let bundle = Bundle(for: Autolayout4ViewController.self)
    let sb = UIStoryboard(name: "AutoLayout4", bundle: bundle) // 스토리보드 파일 로드
    let vc = sb.instantiateViewController(withIdentifier: "Autolayout4ViewController")
    return vc
}
Reference
- https://jeong9216.tistory.com/694#google_vignette