[UIKit] iOS 푸시알림 FCM, APNS
iOS 푸시알림 FCM, APNS
iOS에서 푸시 종류는 2가지가 있다.
- 로컬에서 직접 보내는 알림
- 서버에서 보내는 알림
- 서버에서 보내는 APNS(Apple Push Notification Service)
-
FCM(Firebase Cloud Messaging) -> 이번 포스팅에서는 FCM을 활용한 2번 방식을 진행할 예정이다.
APNS 란?
APNS (Apple Push Notification Service) 는
iOS의 모든 원격 알림이 반드시 거쳐야 하는 애플 공식 푸시 전달 서버이다..
즉, 푸시 메시지를 내가 직접 사용자 기기로 보내는 게 아니라
→ APNS에 요청
→ APNS가 사용자 기기로 전송
하는 방식이다.
FCM 란?
FCM은 Google에서 제공하는 클라우드 기반 메시징 서비스로,
iOS의 APNS를 포함해 Android, Web 등 다양한 플랫폼에 푸시 메시지를 전송할 수 있도록 중간 서버 역할을 해준다.
iOS에서 FCM을 통해 푸시 알림을 보내면, FCM 내부적으로 APNS를 거쳐서 사용자 기기에 도달한다.
FCM이 APNS 대신 해주는 것들
- 애플 인증서 등록 및 관리
- APNS에 메시지 전송 요청
- 안드로이드, iOS 둘 다 지원 (멀티 플랫폼)
- 클라우드 환경에서 손쉽게 운영
왜 FCM을 쓰는가?
- APNS 서버 직접 구축이 복잡하고 부담스러울 때
- iOS & Android를 동시에 지원하는 일관된 환경이 필요할 때
- 푸시 알림 시스템을 빠르게 구축하고 싶을 때
- Firebase Analytics, A/B 테스트 같은 연계 기능을 활용할 때
푸시 알림의 기본 동작 흐름
- 앱이 APNS에 Device Token 요청
- 이 토큰은 앱이 설치된 기기의 주소 역할을 한다.
- APNS가 앱에게 Device Token 전달
- 앱이 Device Token을 푸시 서버(FCM 등)에 전달
- 이 서버가 실제 푸시 메시지를 보낼 주체이다.
APNS를 통한 푸시 알림 동작 구조
- 푸시 서버(예: FCM)가 메시지와 Device Token을 APNS에 전송
- 이때 APNS와 푸시 서버는 TLS 인증으로 보안 통신
- 서버에는 APNS 인증 정보(p8 키 or 인증서)가 등록되어 있어야 함
- APNS는 해당 디바이스로 푸시 메시지를 전송
- 디바이스에서 푸시 알림 수신
실습
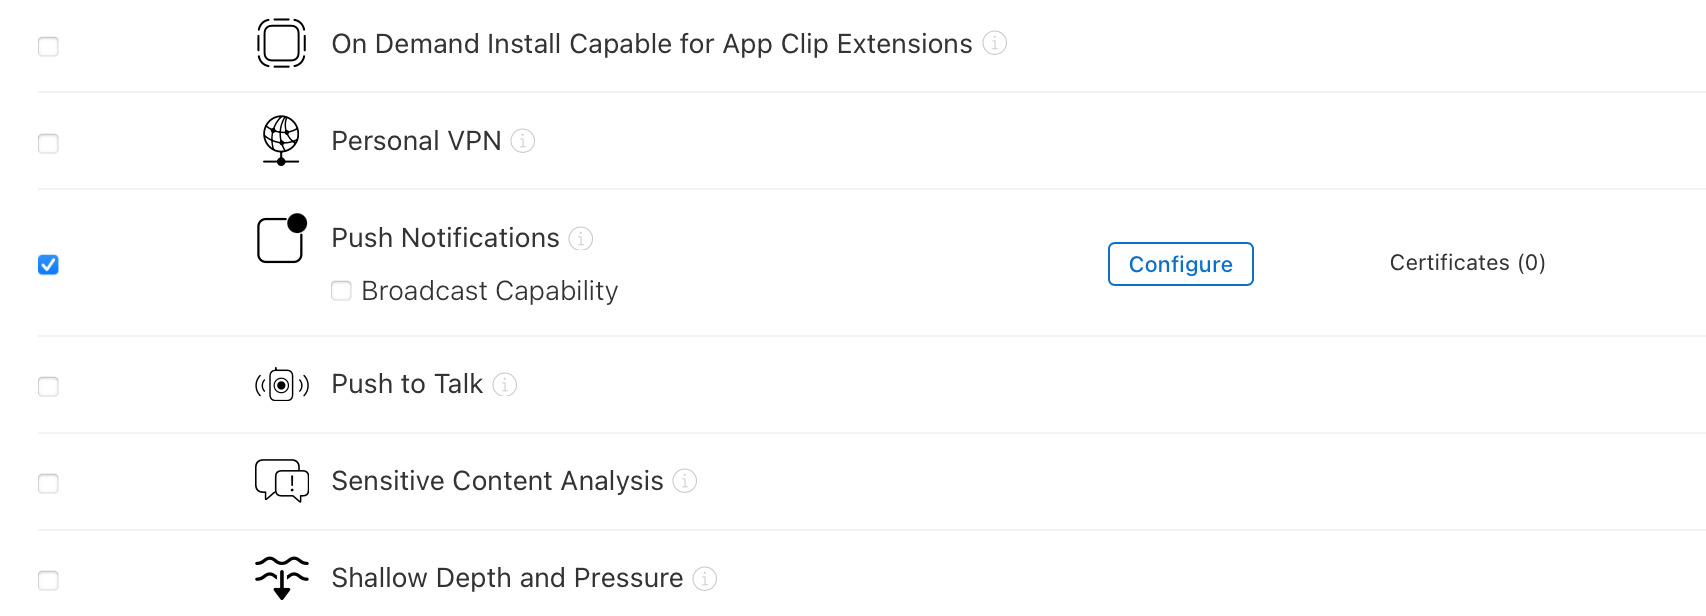
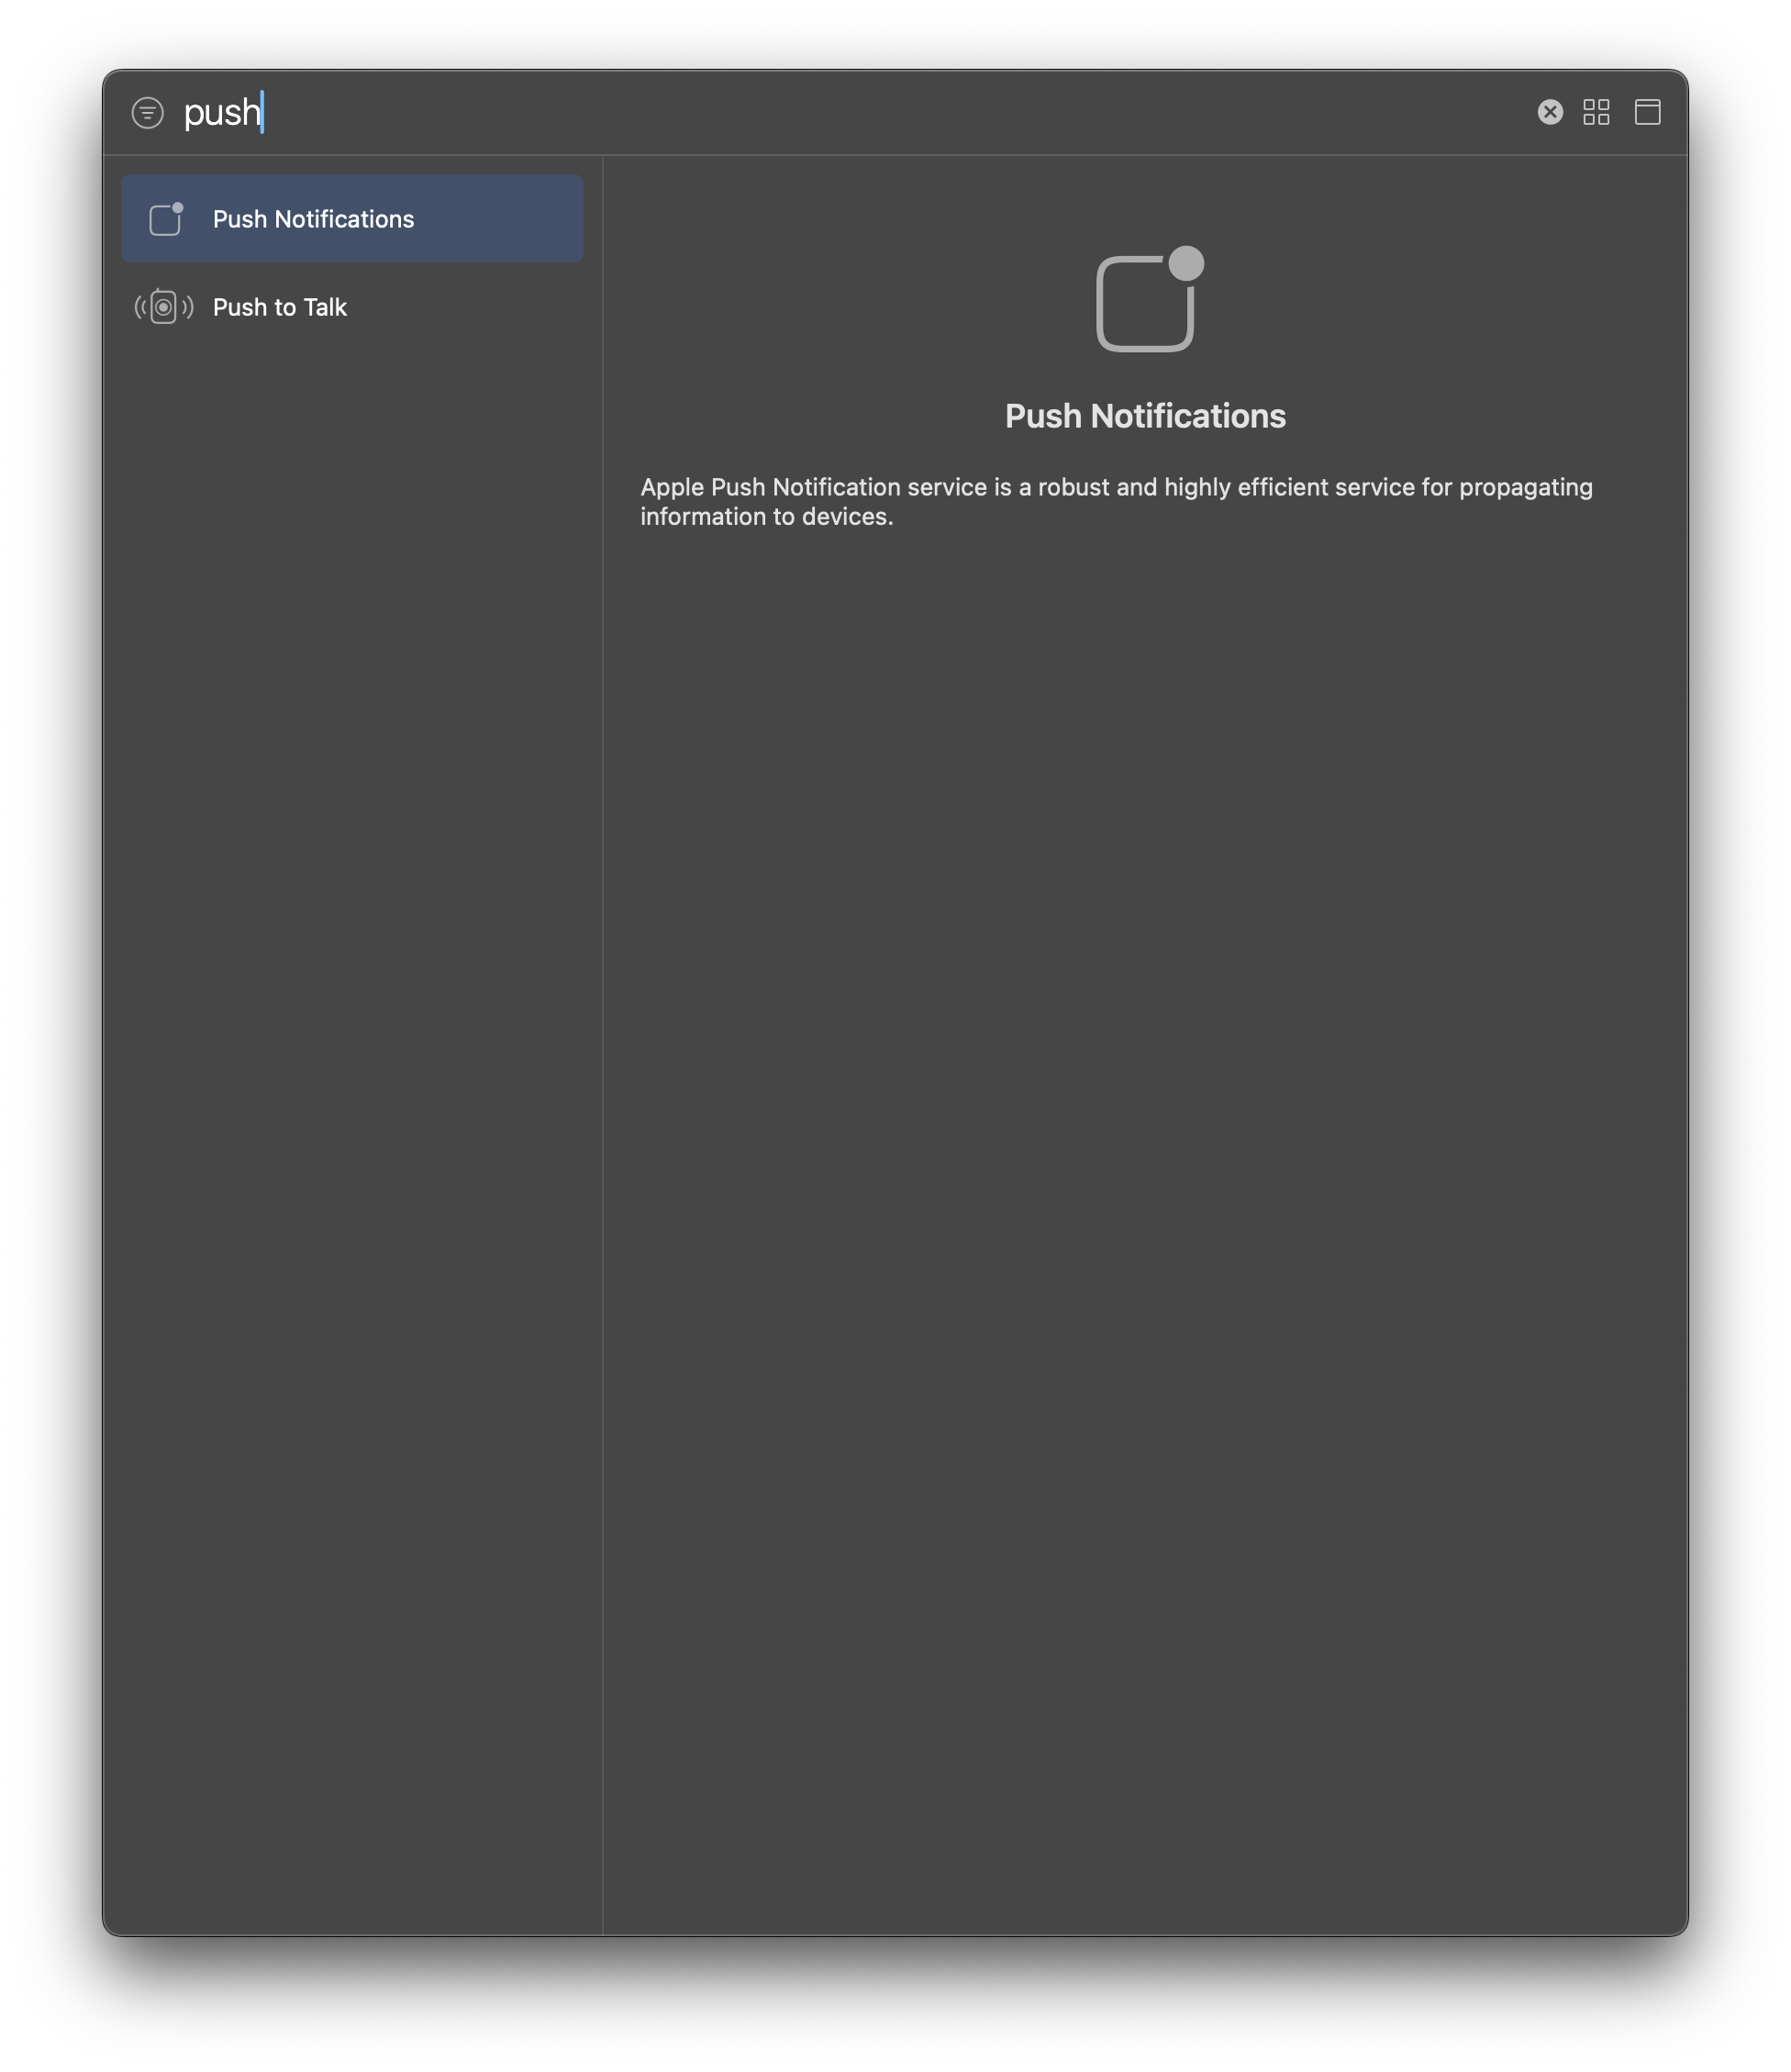
identifiers에서 해당 프로젝트 누른 후 push notification 체크박스 체크 해준다.
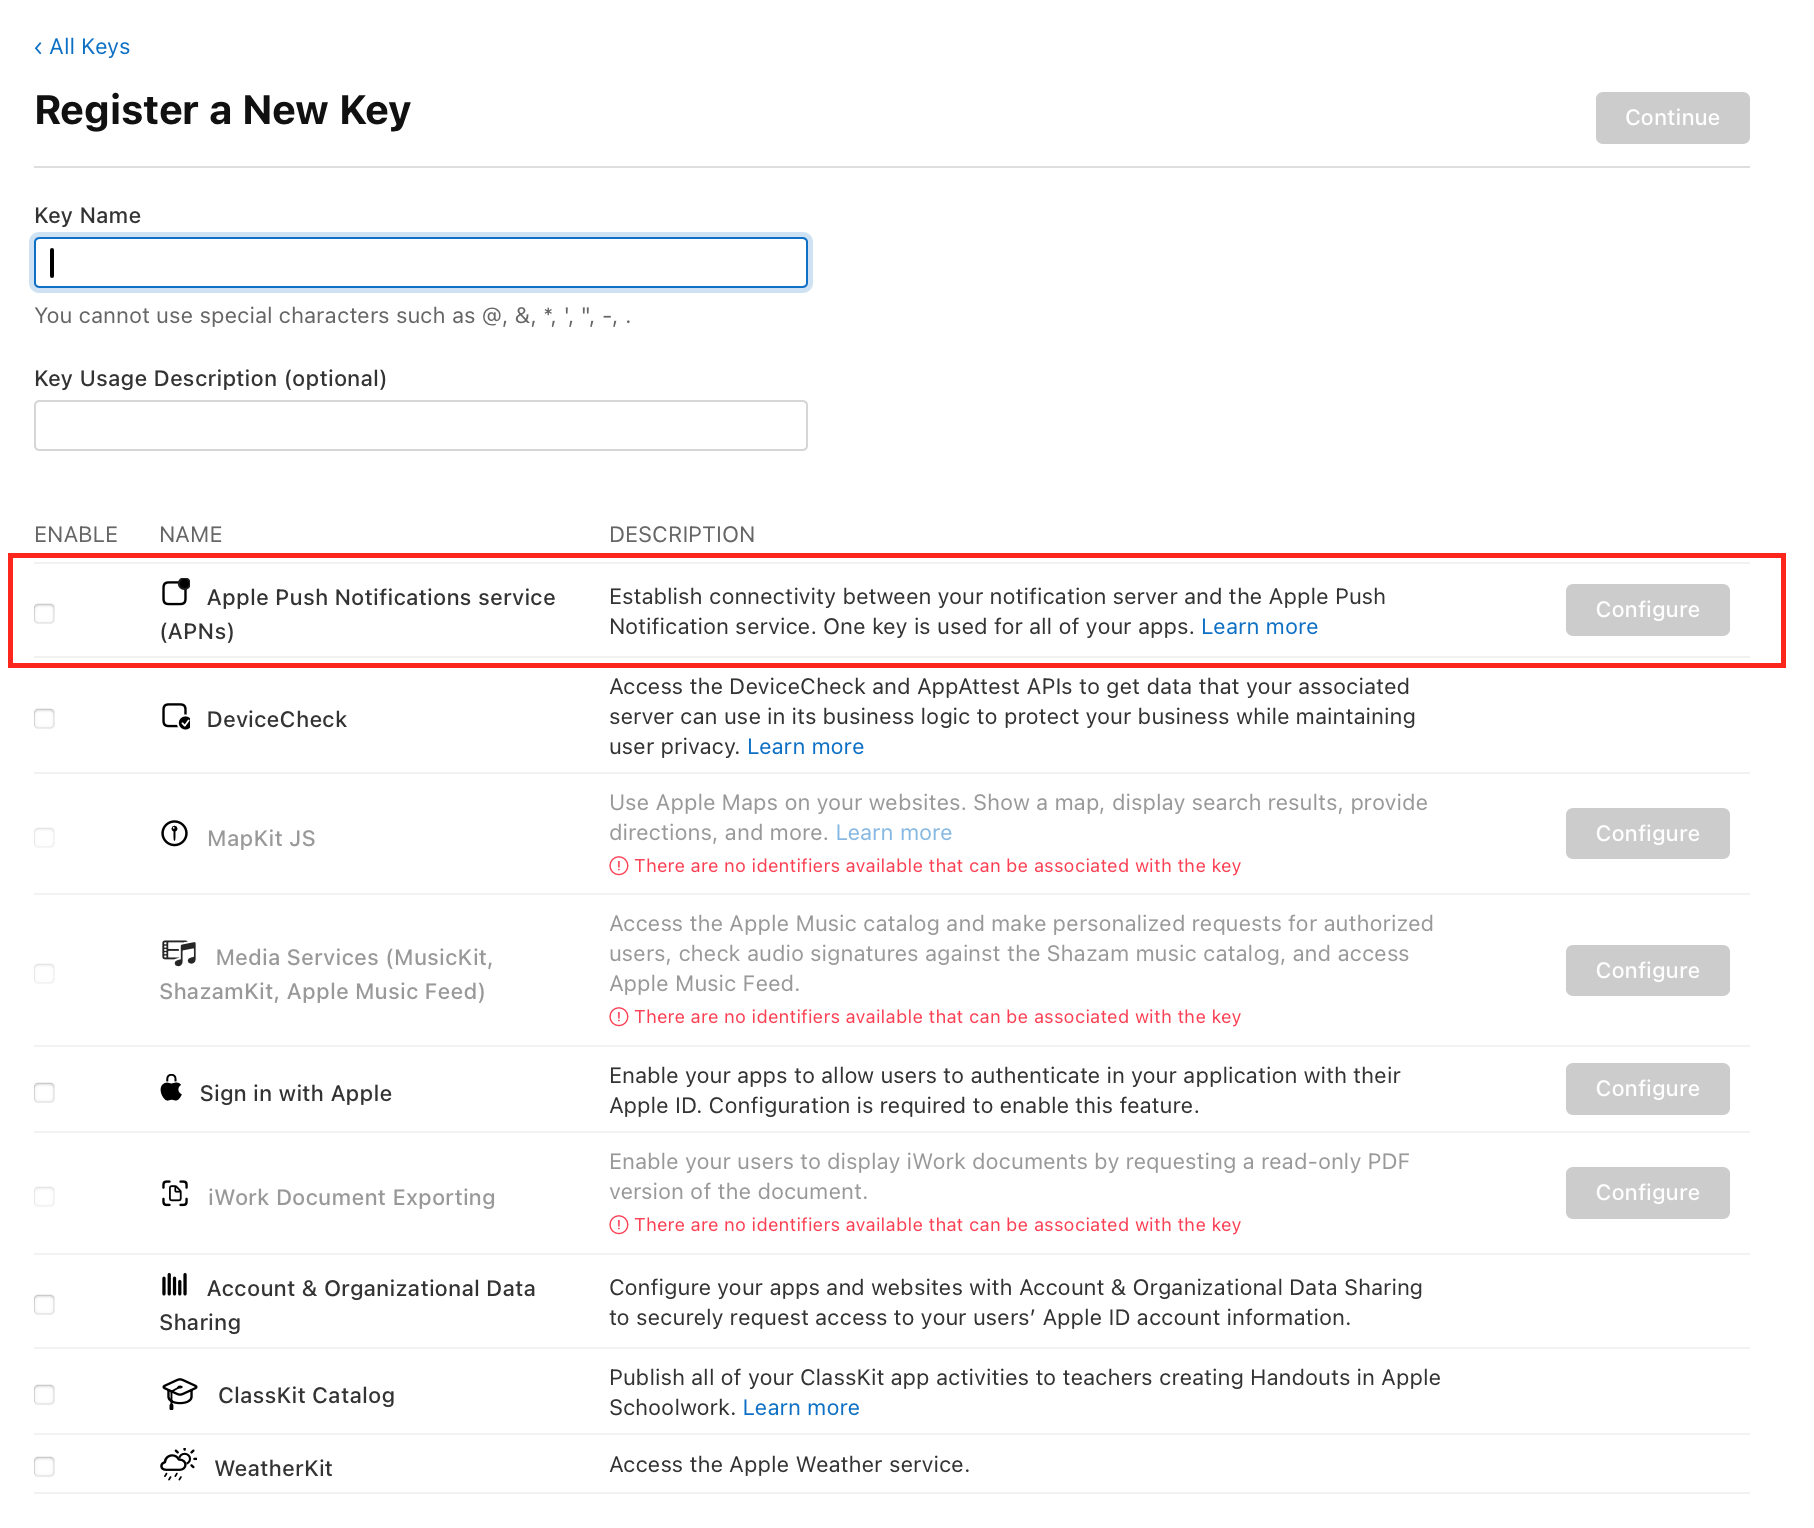
keys에서 키를 발급 해준다. 완료하면 Download버튼이 생긴다 이를 통해 p8파일을 다운로드 한다.
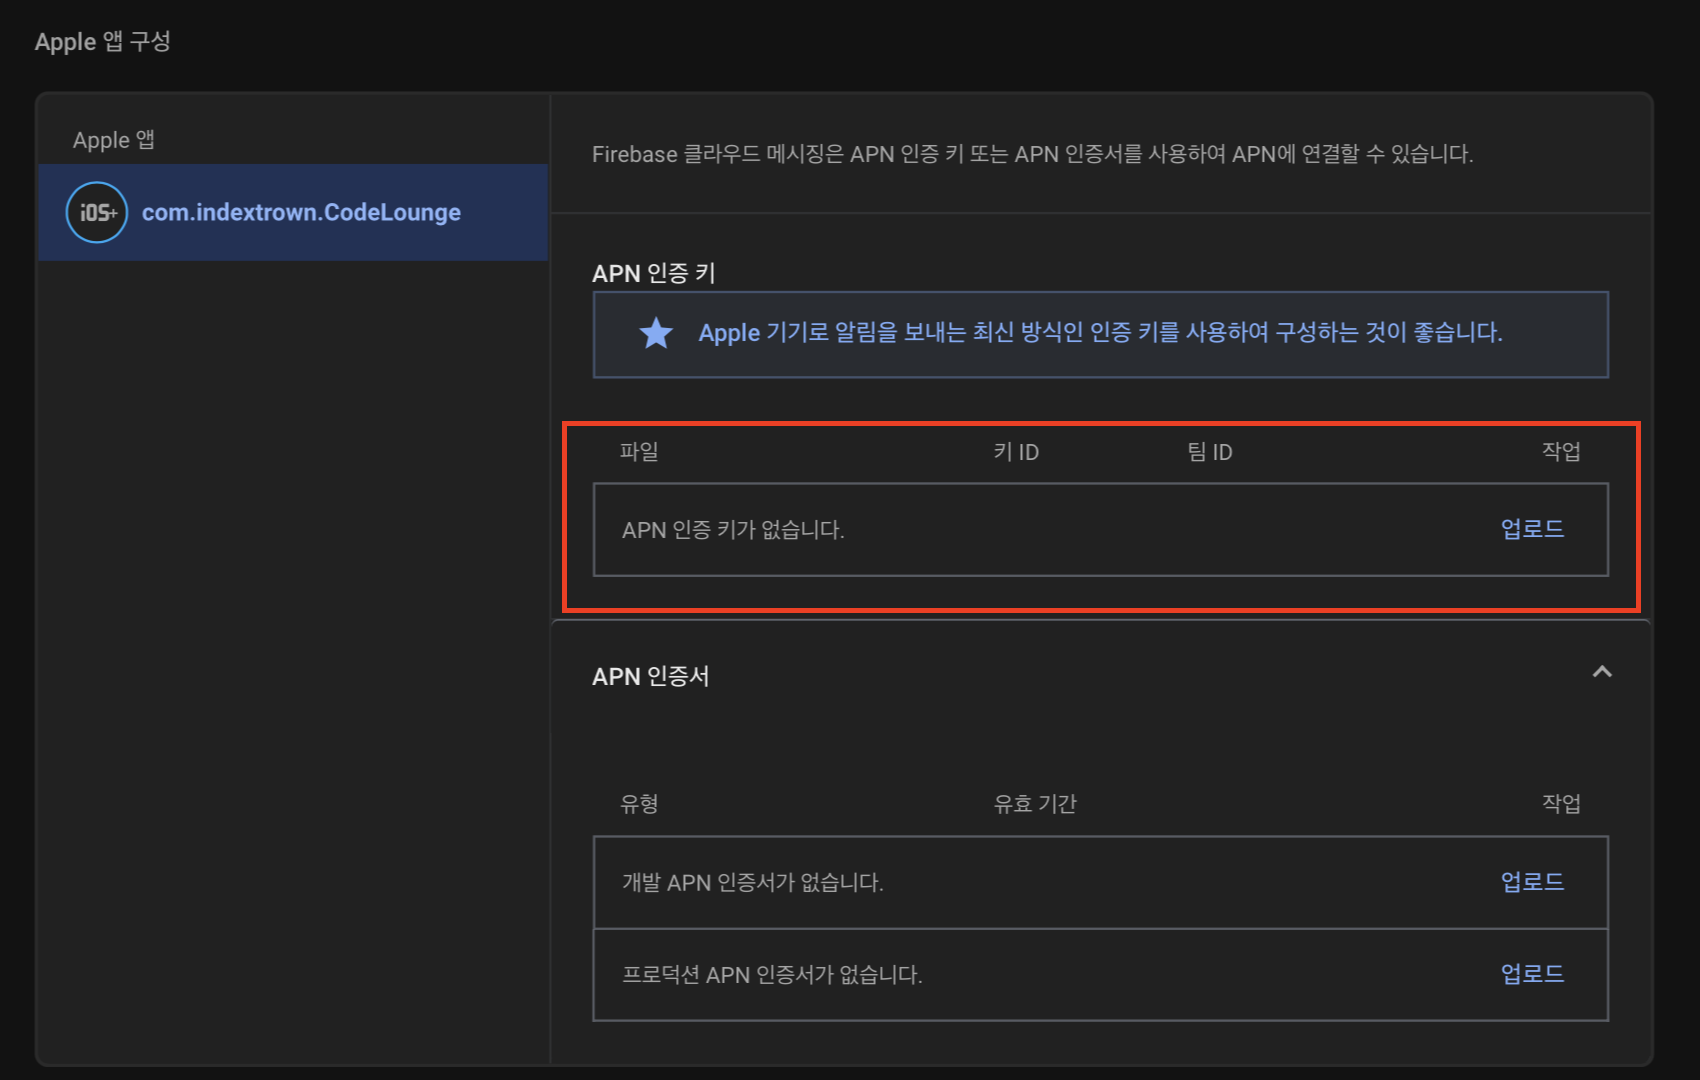
firebase 프로젝트 -> 프로젝트 설정 -> 클라우드 메시징에서 APNS인증키를 등록해준다.
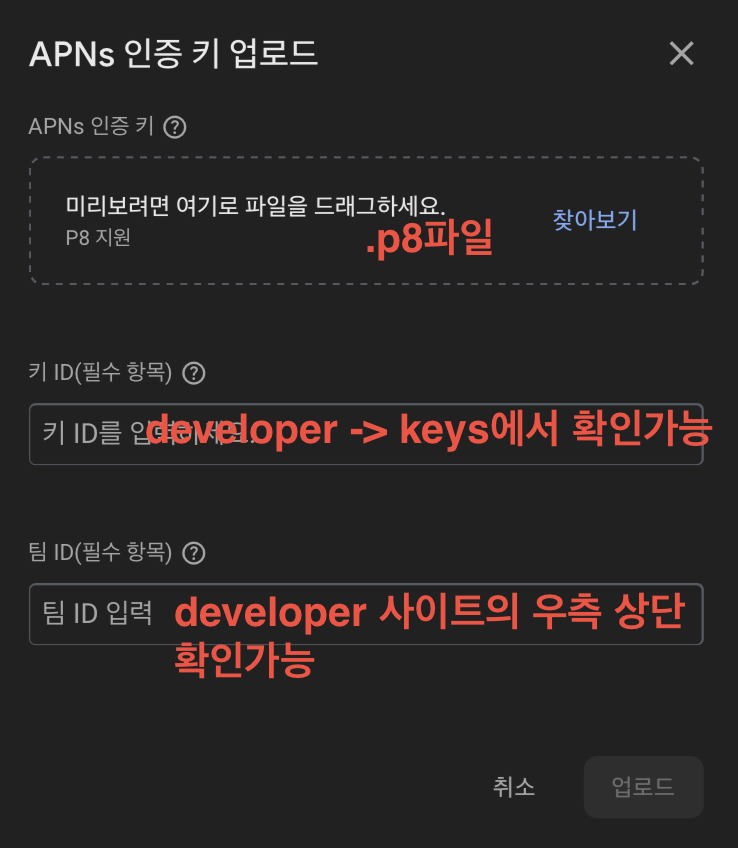
업로드를 눌러서 완료한다.
 |
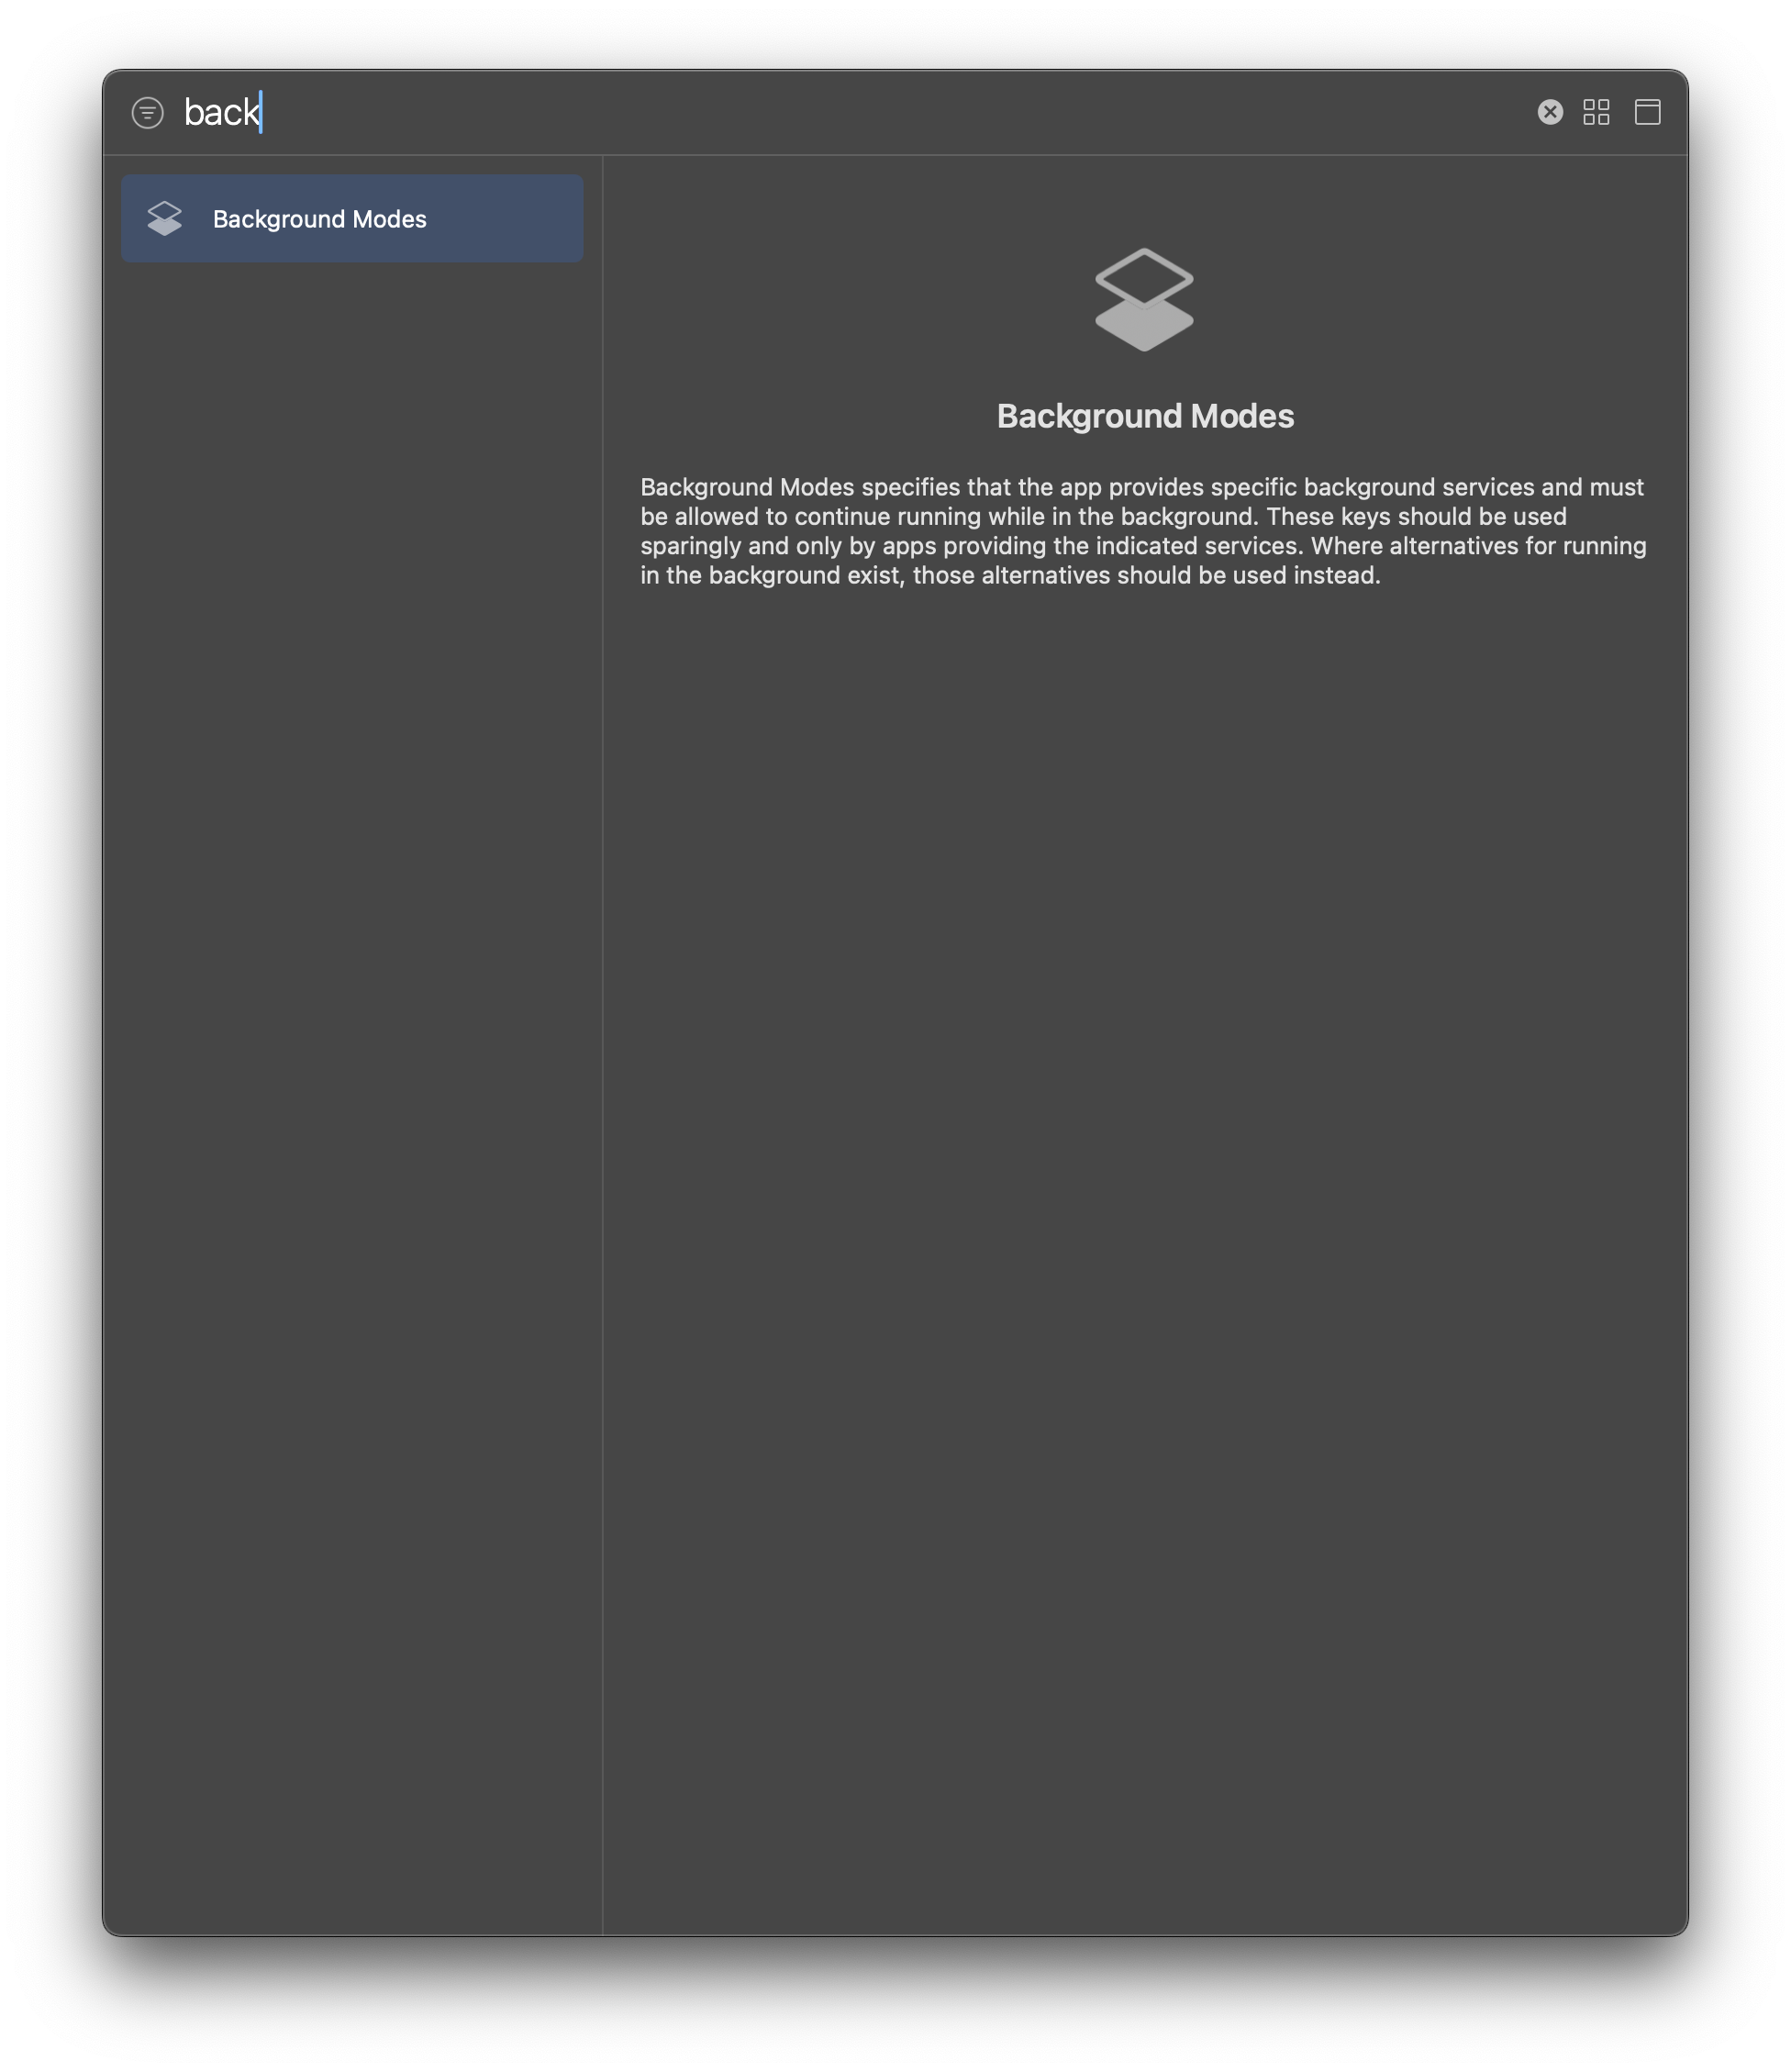 |
| Push Notifications | Background Modes |
xcode -> target -> Push Notifications, Background Mode 추가한다.

Remote Notifications 체크해준다.
AppDelegate.swift
import UIKit
import FirebaseCore
import FirebaseMessaging
import UserNotifications

@main
class AppDelegate: UIResponder, UIApplicationDelegate {

    func application(_ application: UIApplication,
                     didFinishLaunchingWithOptions launchOptions: [UIApplication.LaunchOptionsKey: Any]?) -> Bool {

        // Firebase 초기화
        FirebaseApp.configure()

        // 알림 권한 요청
        UNUserNotificationCenter.current().delegate = self
        UNUserNotificationCenter.current().requestAuthorization(
            options: [.alert, .badge, .sound]
        ) { granted, error in
            print("✅ 알림 권한 요청 결과: \(granted)")
            if granted {
                DispatchQueue.main.async {
                    UIApplication.shared.registerForRemoteNotifications()
                }
            }
        }

        // FCM 설정
        Messaging.messaging().delegate = self

        return true
    }
}

extension AppDelegate: UNUserNotificationCenterDelegate {

    // APNs로부터 device token 받았을 때 FCM에 등록
    func application(_ application: UIApplication,
                     didRegisterForRemoteNotificationsWithDeviceToken deviceToken: Data) {
        print("📮 APNS Token 수신: \(deviceToken)")
        Messaging.messaging().apnsToken = deviceToken
    }

    // 앱이 실행 중일 때 알림 수신 (배너로 표시되게 설정)
    func userNotificationCenter(_ center: UNUserNotificationCenter,
                                willPresent notification: UNNotification,
                                withCompletionHandler completionHandler: @escaping (UNNotificationPresentationOptions) -> Void) {
        completionHandler([.list, .banner, .sound])
    }
}

extension AppDelegate: MessagingDelegate {

    // FCM 토큰 갱신될 때 호출
    func messaging(_ messaging: Messaging, didReceiveRegistrationToken fcmToken: String?) {
        print("📌 FCM Token: \(fcmToken ?? "nil")")

        // 필요 시 NotificationCenter로 다른 컴포넌트에 전달
        NotificationCenter.default.post(
            name: Notification.Name("FCMToken"),
            object: nil,
            userInfo: ["token": fcmToken ?? ""]
        )
    }
}
- 빌드하면 나오는 FCM을 복사한다.
FCM.py
import firebase_admin
from firebase_admin import credentials, messaging
# 1. 서비스 계정 키 경로 (.json)
cred = credentials.Certificate("파이어베이스 설정 -> 서비스 계정 -> 새 비공키 키 생성시 .json파일 다운 가능 -> 해당 경로 입력")
firebase_admin.initialize_app(cred)
# 2. 대상 유저의 FCM 토큰
fcm_token = "빌드하면 나오는 FCM 입력"
# 3. 전송할 메시지
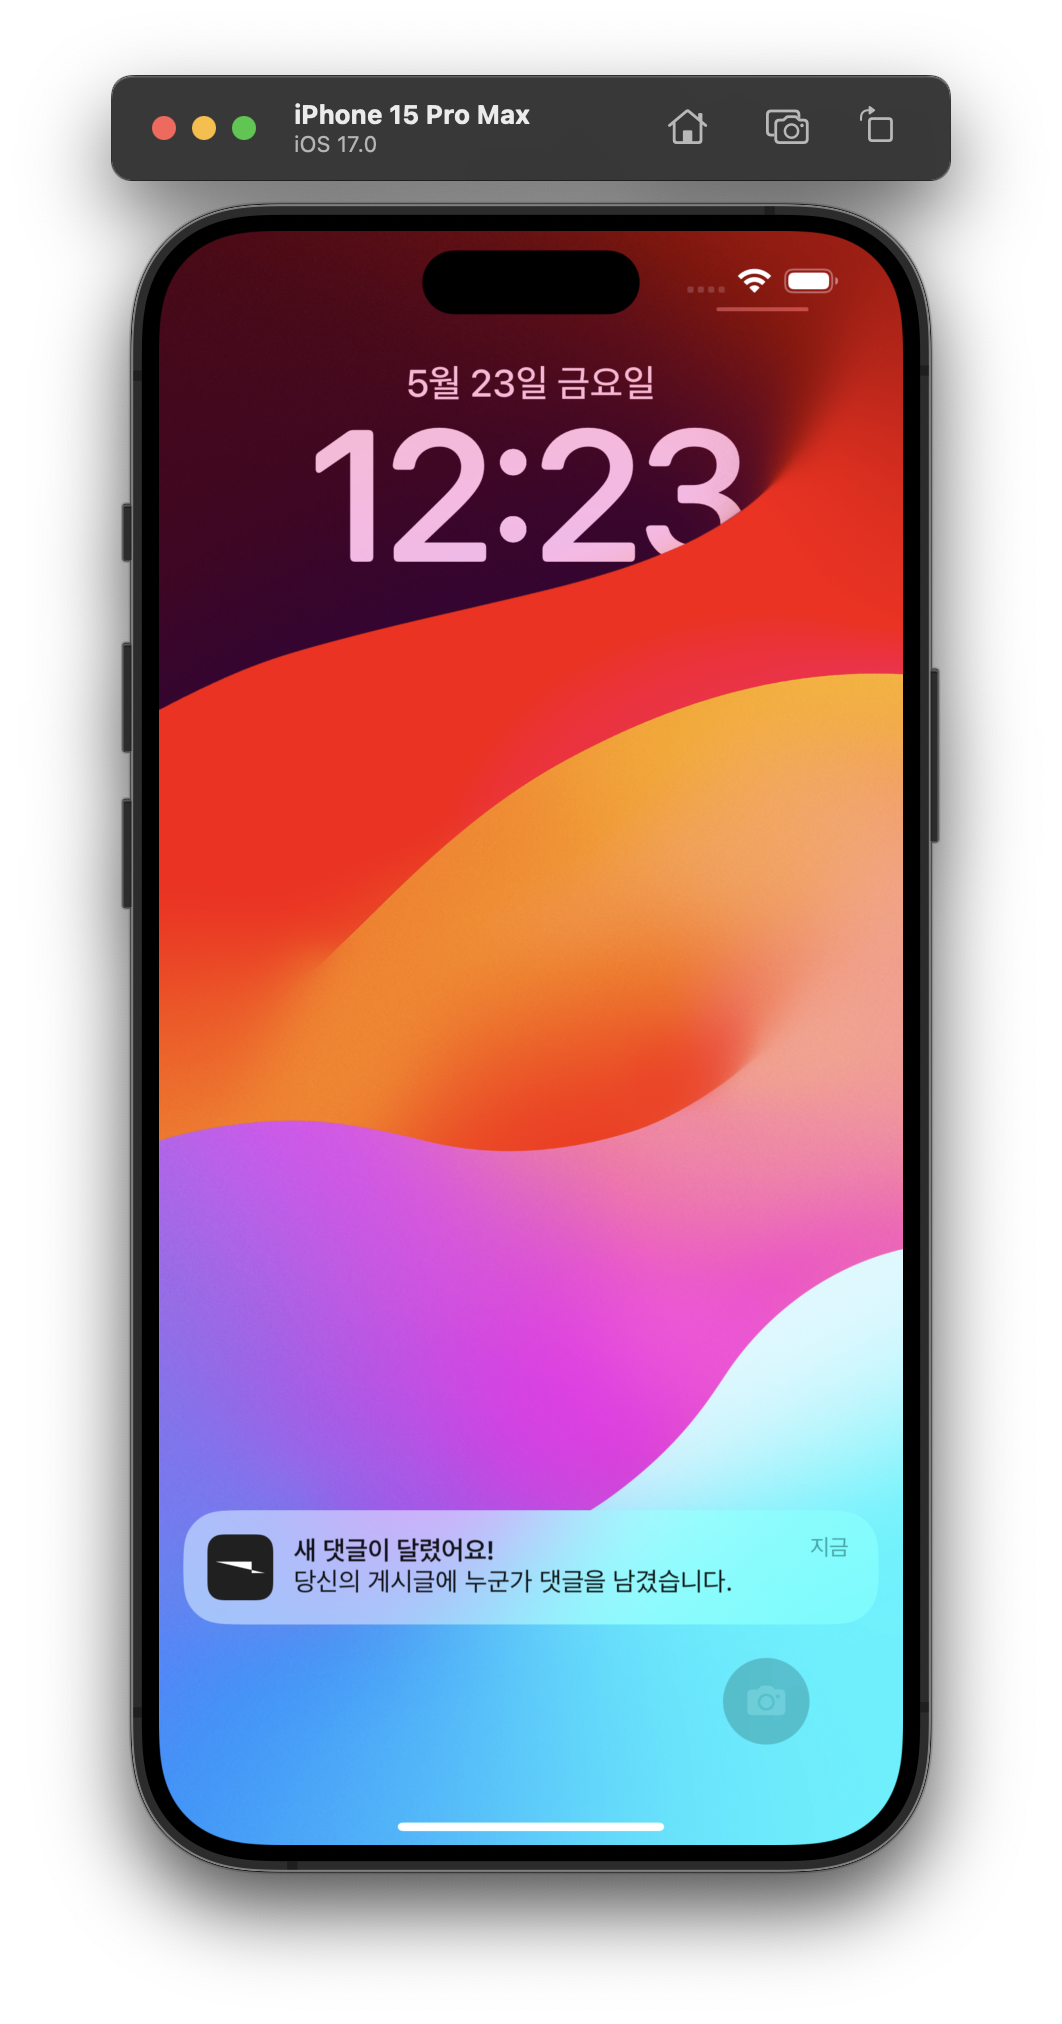
title = "새 댓글이 달렸어요!"
body = "당신의 게시글에 누군가 댓글을 남겼습니다."
# 4. 알림 메시지 구성
message = messaging.Message(
token=fcm_token,
notification=messaging.Notification(
title=title,
body=body,
)
)
# 5. 메시지 전송
try:
response = messaging.send(message)
print("✅ 메시지 전송 성공:", response)
except Exception as e:
print("❌ 메시지 전송 실패:", e)
 |
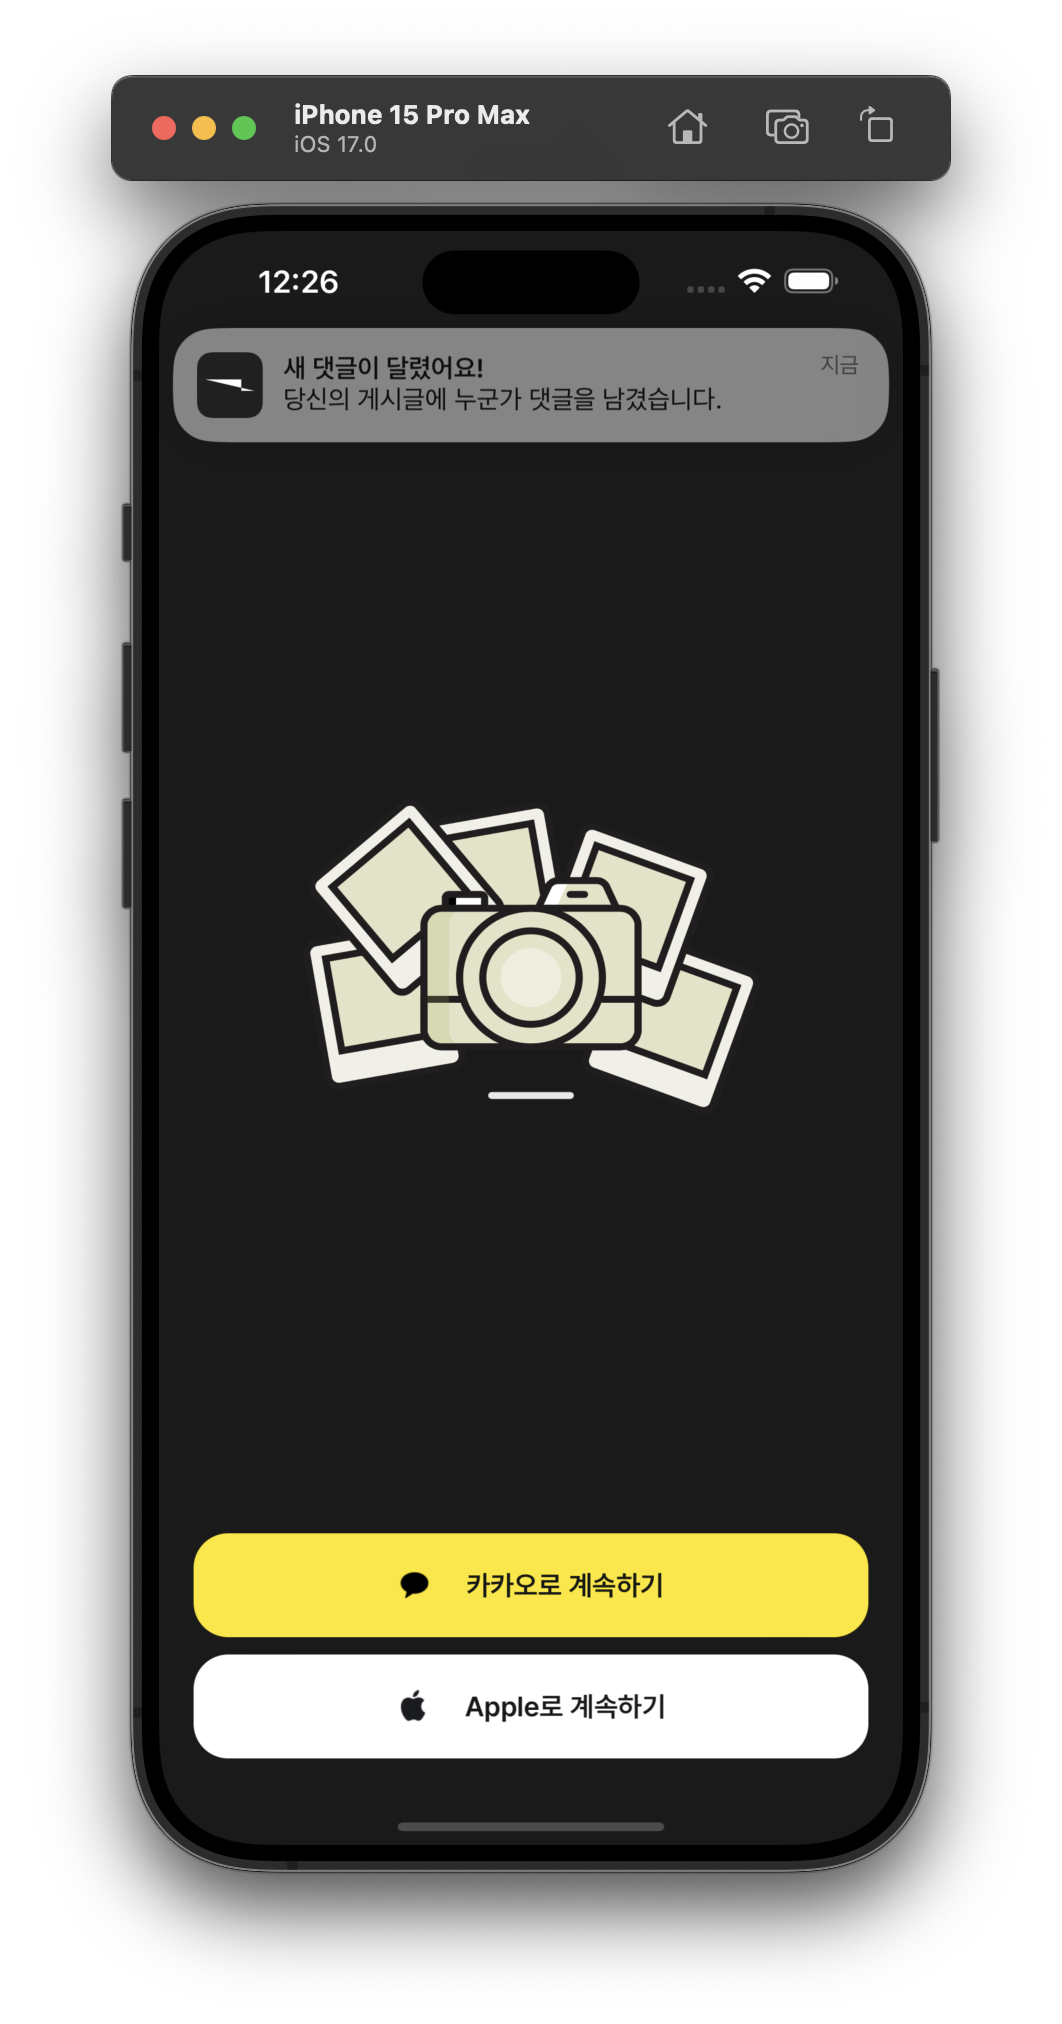 |
| 앱이 종료되어있을 때 | 앱 실행중일 때 |
Reference
- https://bannavi.tistory.com/558
- https://dokit.tistory.com/49
- https://dokit.tistory.com/50
- https://velog.io/@niro/Firebase-Push-Notification-알림-보내기-with-SwiftUI
- https://yagom.net/forums/topic/push-알림을-보낼-때-fcm-과-apns-의-차이점이-있나요/