[TableView] 6. Cell Configuration
Cell Configuration 알아보기
Cell Configuration은 iOS 14+부터 도입된 기능으로, 셀의 UI 구성과 데이터 설정을 보다 선언적으로 처리할 수 있도록 도와준다.
기존에는 셀마다 IBOutlet을 연결하거나, cell.textLabel.text = ... 방식으로 직접 설정했지만,
Cell Configuration은 UI와 데이터를 분리하고 설정 구조체를 통해 셀 내부 뷰를 생성 및 업데이트하는 구조다.
화면 구성 예시
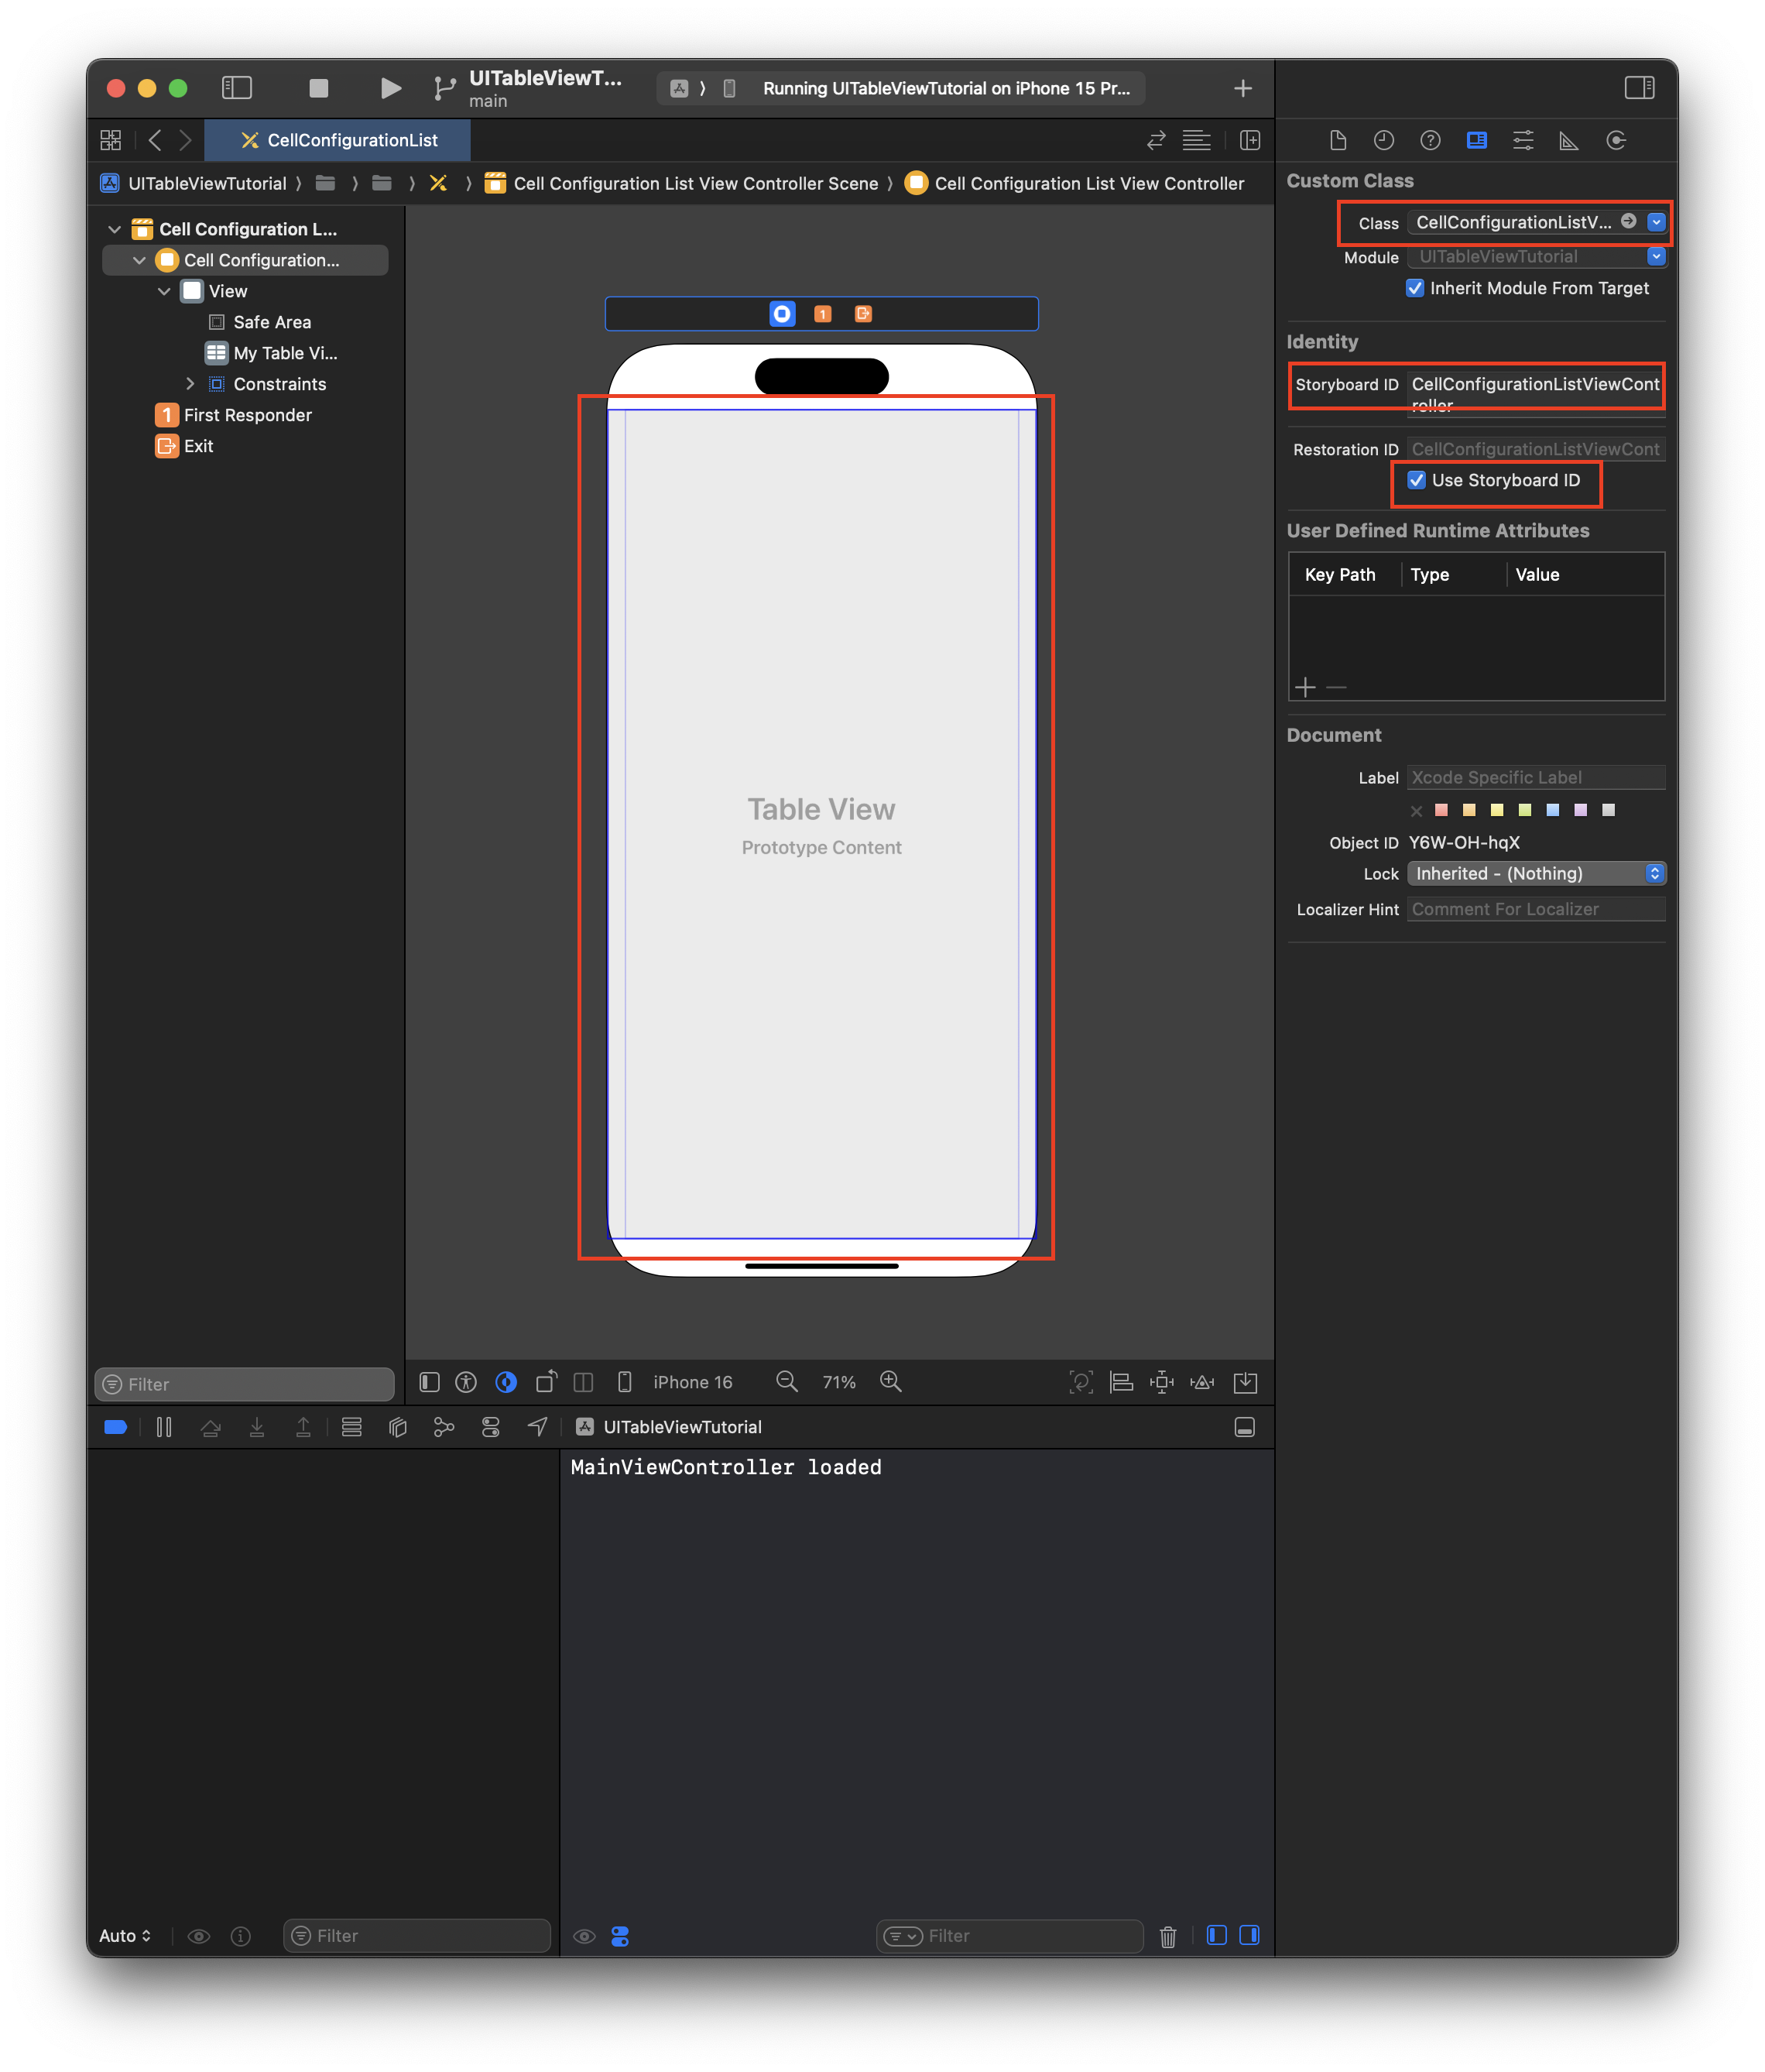
- 테이블뷰를 스토리보드에서 추가하고, 상하좌우 제약을 0으로 설정한다
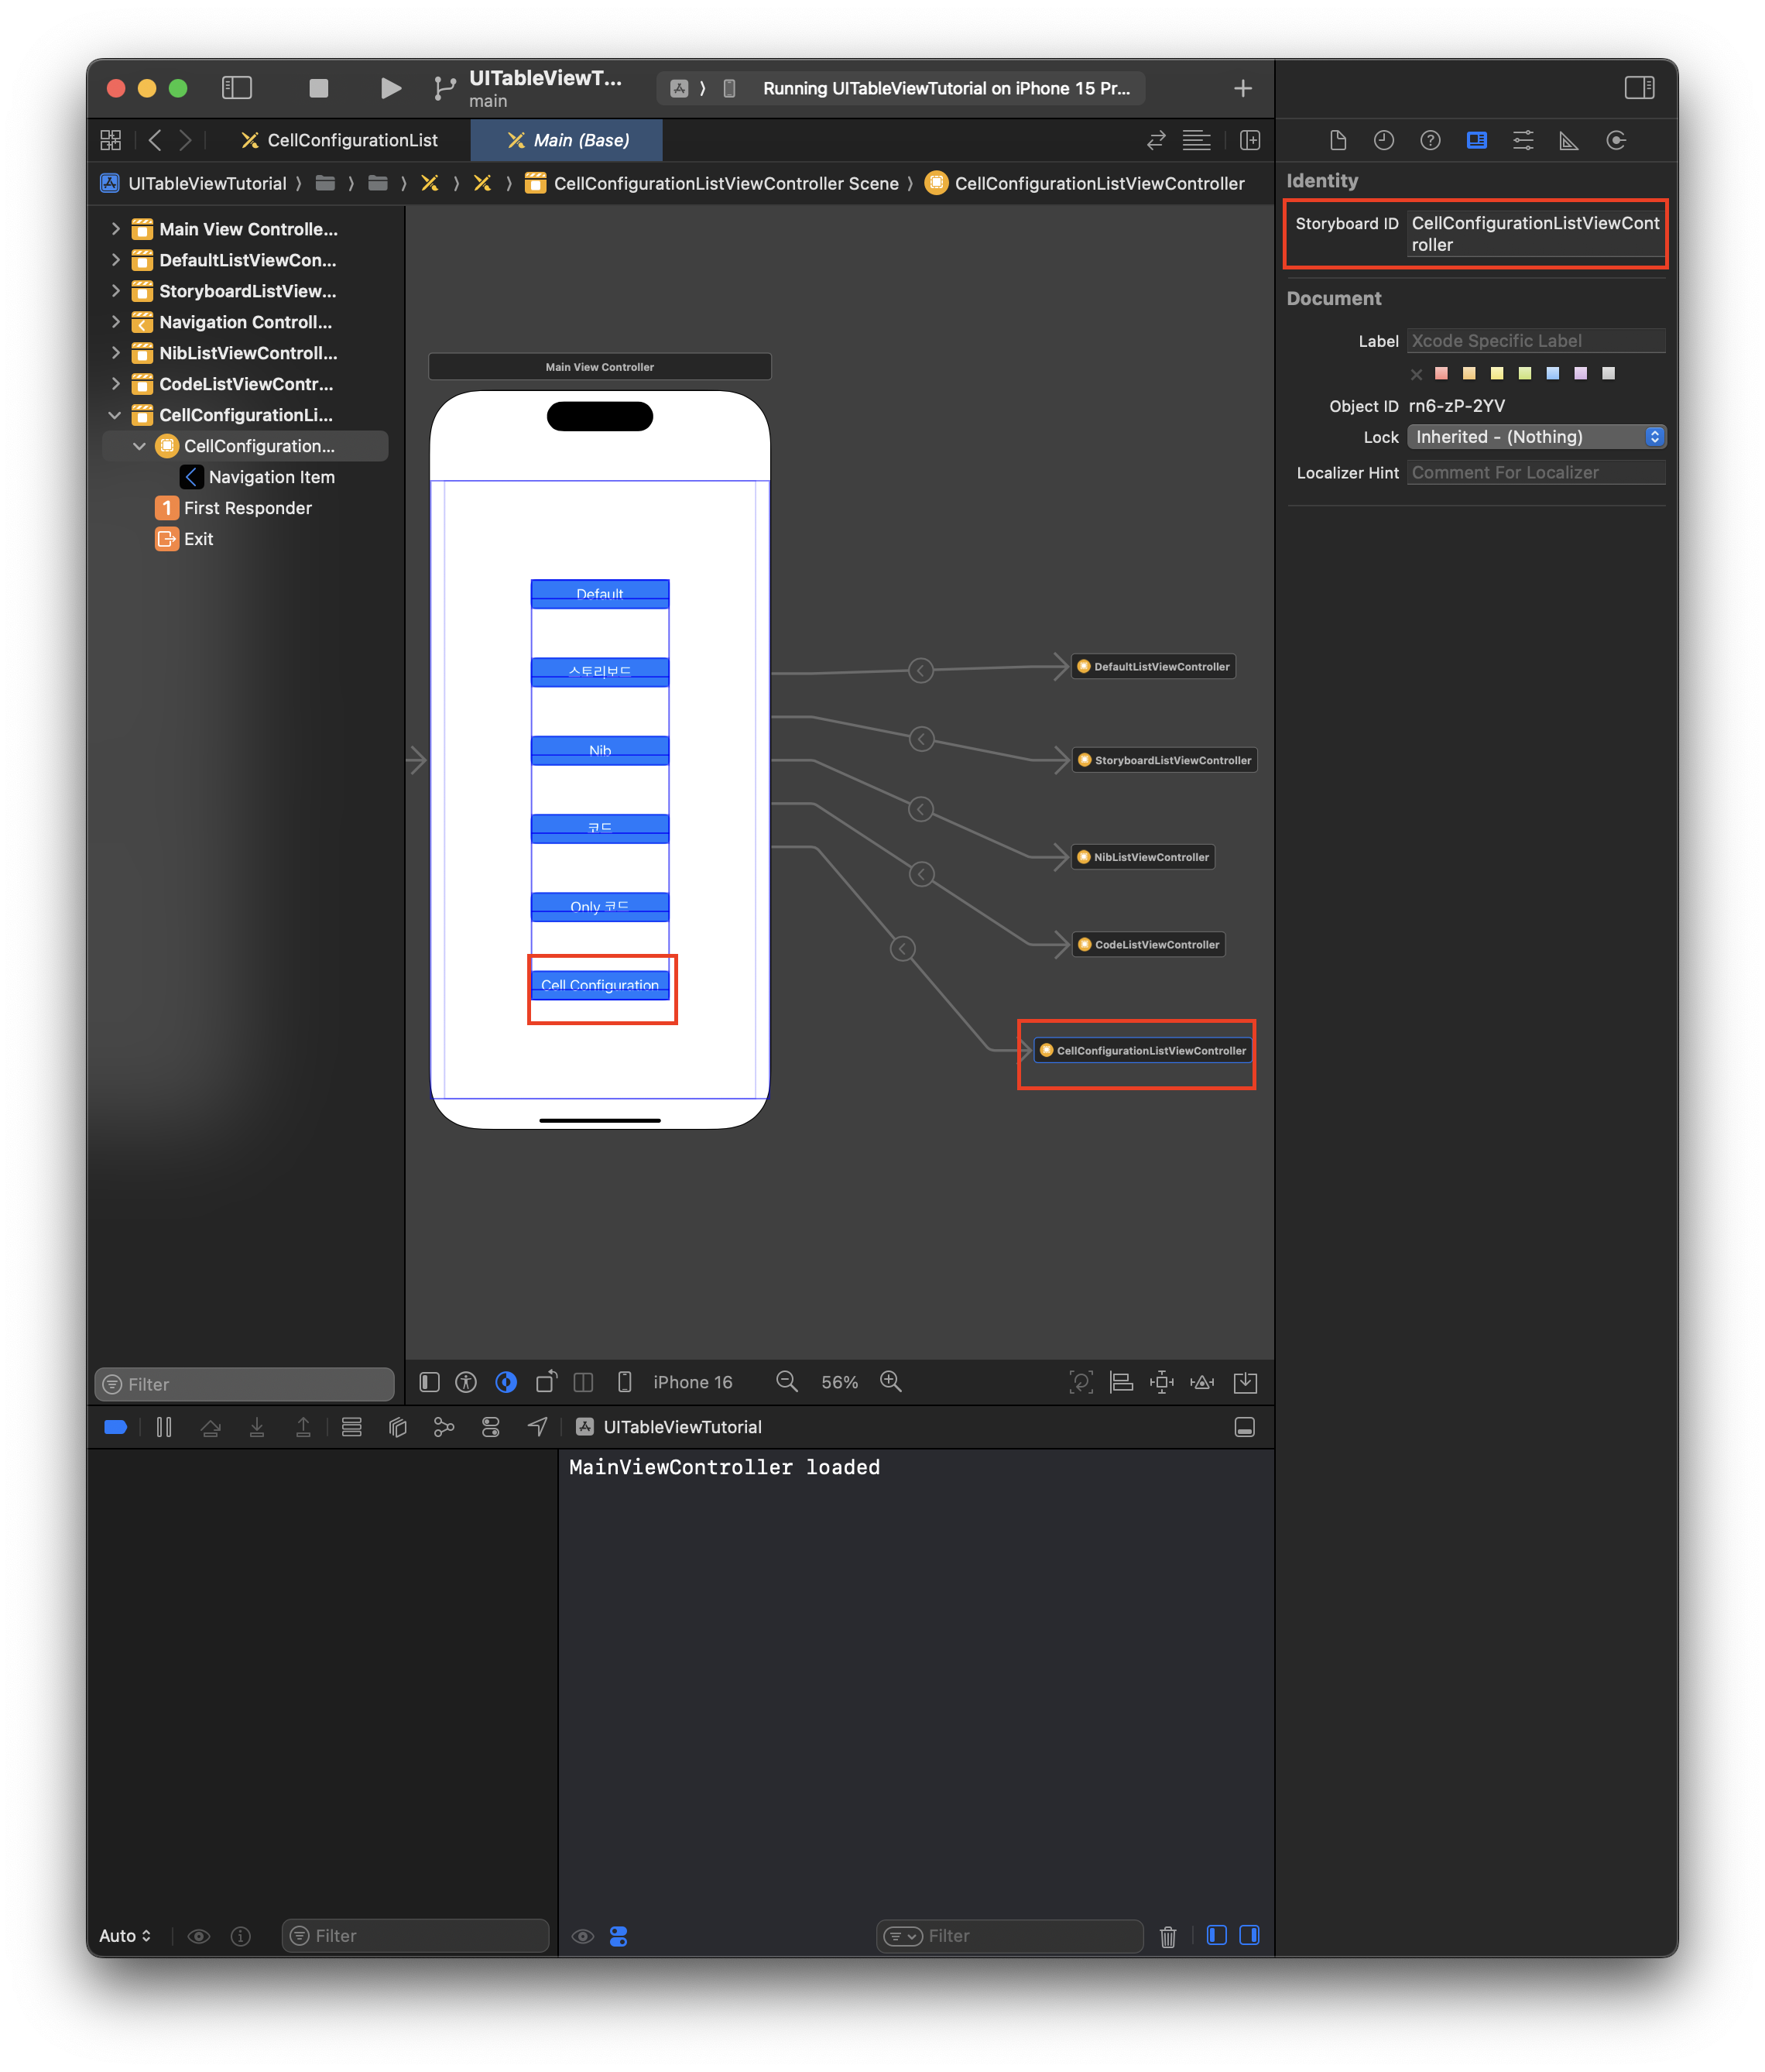
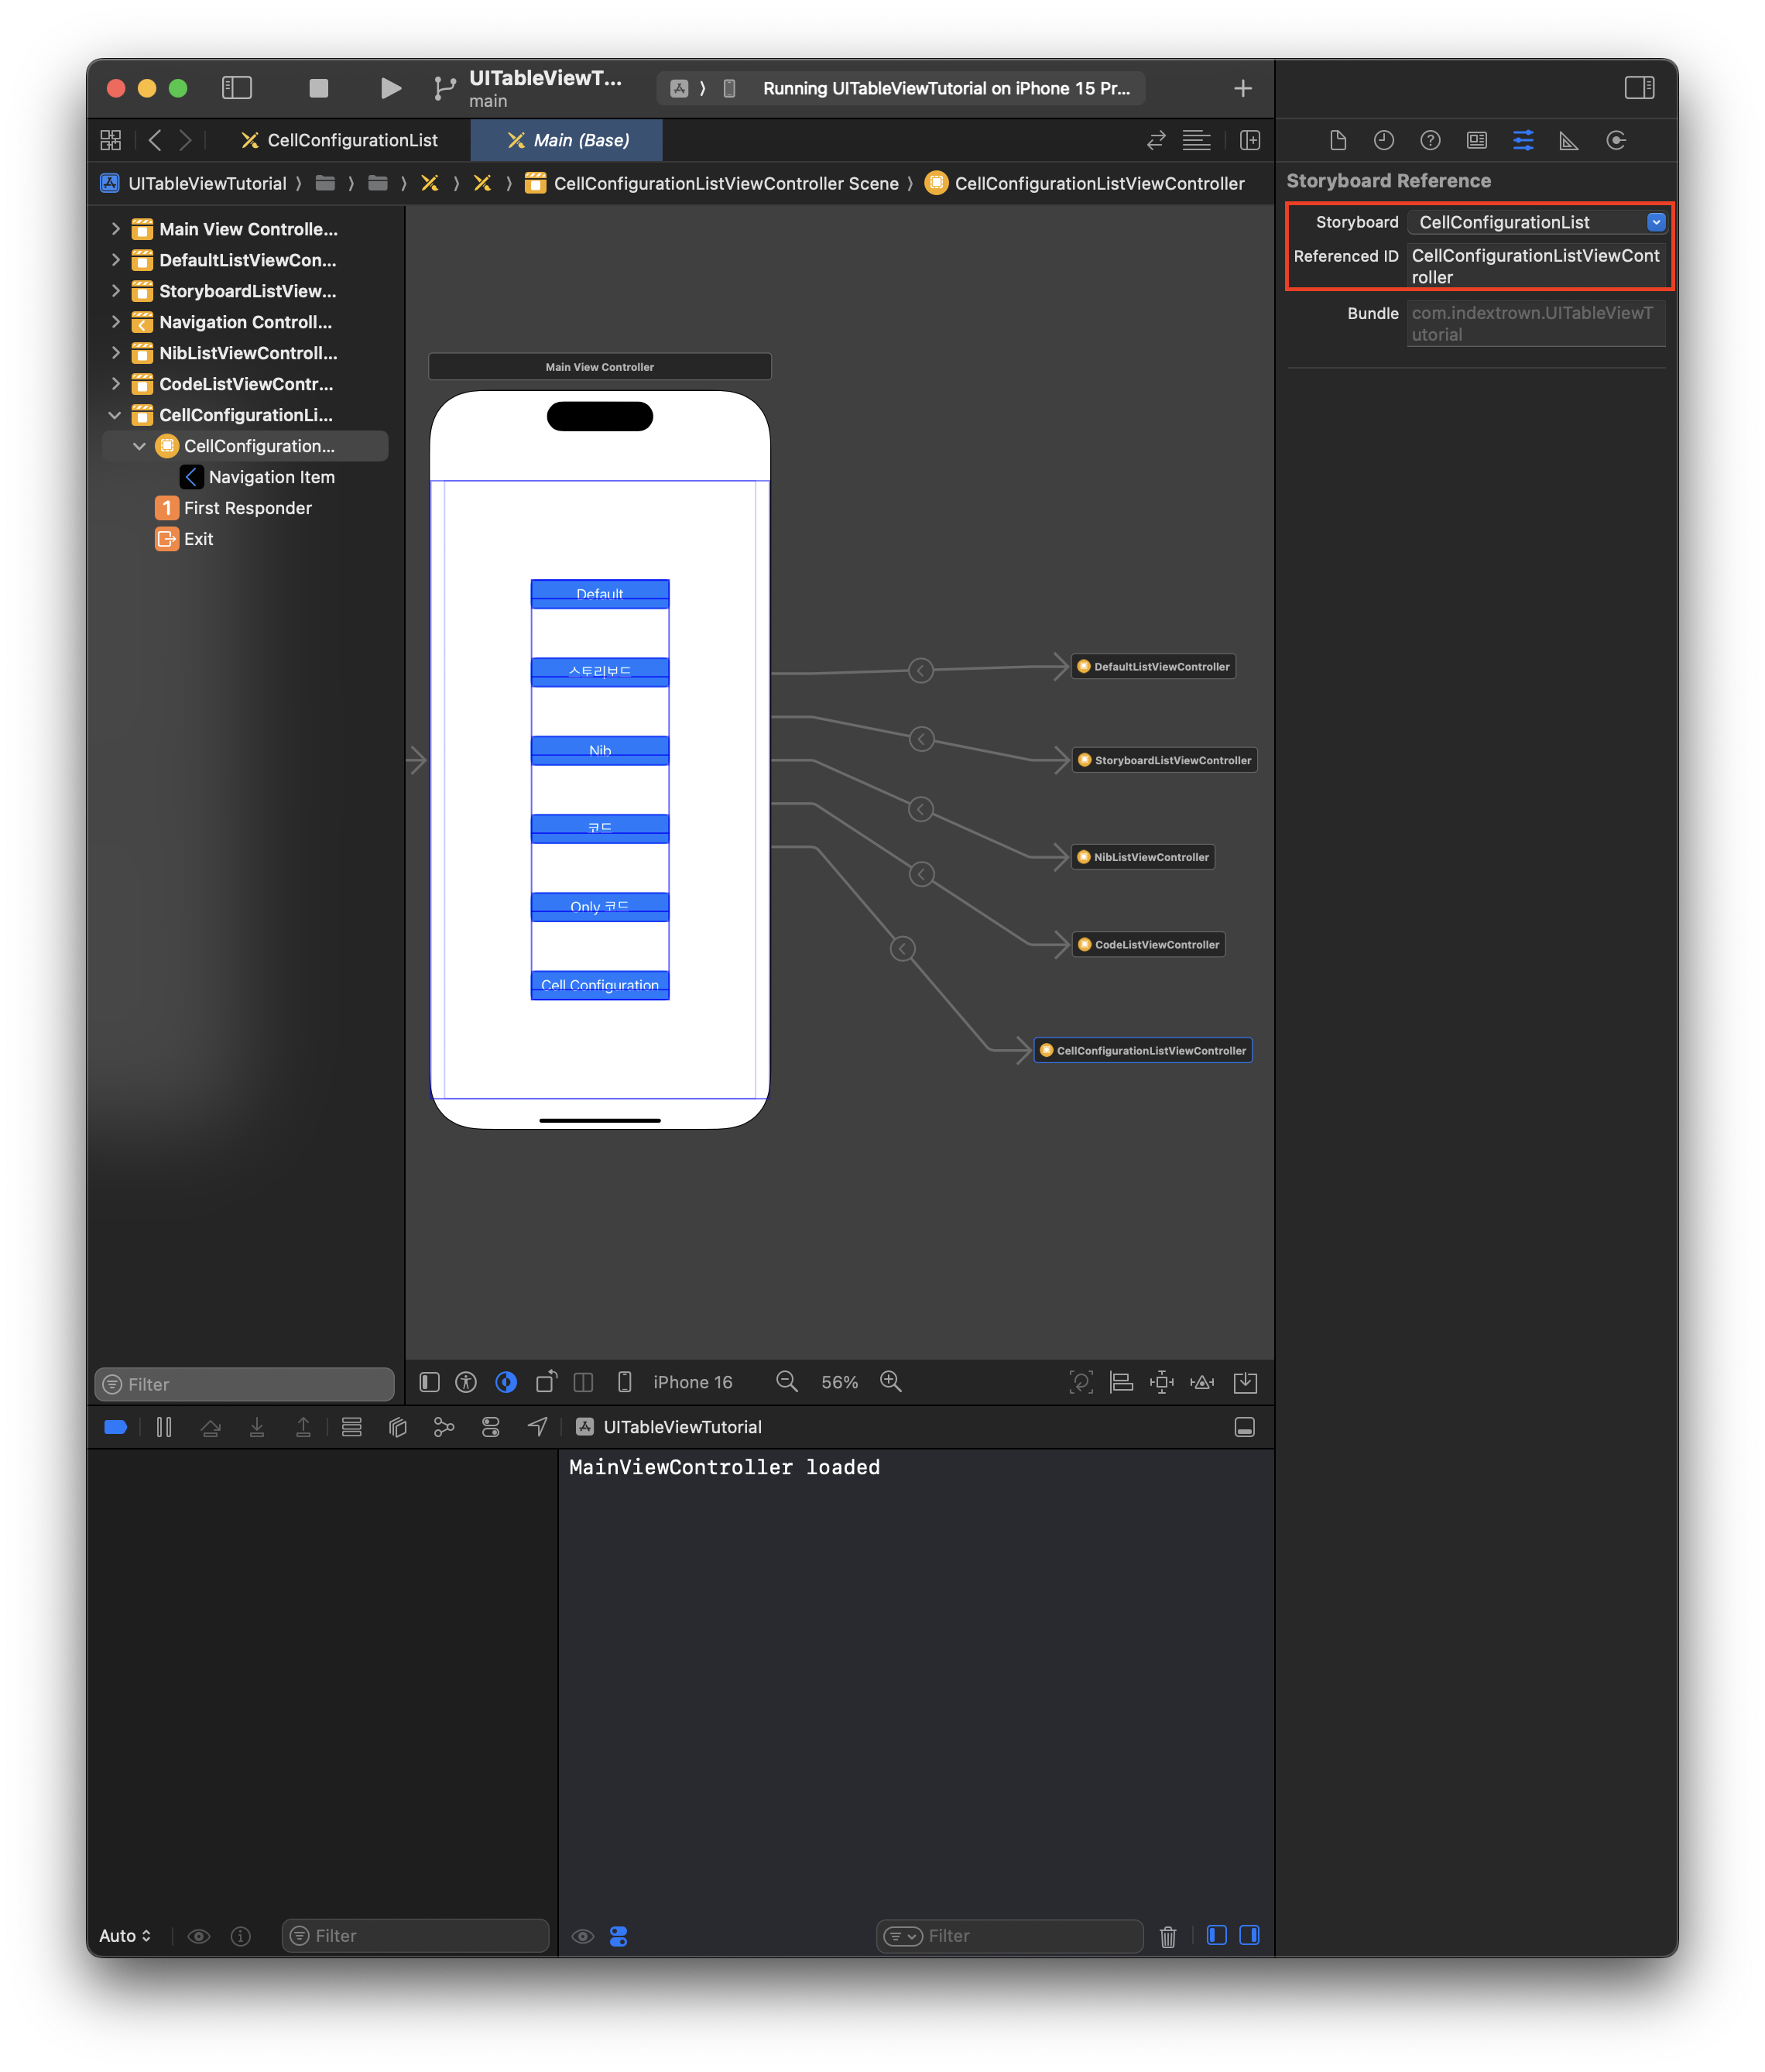
Storyboard ID는CellConfigurationListViewController로 지정Reference ID도 동일하게 맞춰야 코드에서 호출 가능
구성
Cell Configuration을 구성하는 핵심 요소는 다음과 같다:
| 요소 | 설명 |
|---|---|
UIContentConfiguration |
데이터 설정을 위한 구조체 역할 (예: MyCellConfiguration) |
UIContentView |
실제 UI를 그리는 뷰 (예: CellConfigurationView) |
UITableViewCell |
시스템이 자동으로 UIContentView를 삽입해주는 셀 컨테이너 (CellConfigTableViewCell) |
1. MyCellConfiguration.swift
struct MyCellConfiguration: UIContentConfiguration, Hashable {
    var title: String = ""
    var body: String = ""

    func makeContentView() -> UIView & UIContentView {
        return CellConfigurationView(config: self)
    }

    func updated(for state: UIConfigurationState) -> MyCellConfiguration {
        var updated = self
        if let state = state as? UICellConfigurationState, state.isSelected {
            updated.title = "선택됨: " + updated.title
        }
        return updated
    }
}
- 데이터(title, body)를 담고 있고, 상태(state)에 따라 동적으로 내용도 바꿀 수 있다.
makeContentView()를 통해 실제 UIContentView (CellConfigurationView) 생성
2. CellConfigurationView.swift
class CellConfigurationView: UIView, UIContentView {
    var configuration: UIContentConfiguration {
        get { customConfiguration }
        set {
            if let config = newValue as? MyCellConfiguration {
                applyConfig(config)
            }
        }
    }

    init(config: MyCellConfiguration) {
        super.init(frame: .zero)
        configureUI()
        applyConfig(config)
    }

    fileprivate func applyConfig(_ config: MyCellConfiguration) {
        self.customConfiguration = config
        titleLabel.text = config.title
        bodyLabel.text = config.body
    }
}
UIView이자UIContentView를 채택- 외부에서 전달받은
MyCellConfiguration을 적용해서UILabel에 반영 - 내부적으로
titleLabel,bodyLabel을 AutoLayout으로 배치
3. CellConfigTableViewCell.swift
class CellConfigTableViewCell: UITableViewCell {
    var title: String = "" {
        didSet { setNeedsUpdateConfiguration() }
    }

    var body: String = "" {
        didSet { setNeedsUpdateConfiguration() }
    }

    override func updateConfiguration(using state: UICellConfigurationState) {
        var config = MyCellConfiguration().updated(for: state)
        config.title = title
        config.body = body
        self.contentConfiguration = config
    }
}
setNeedsUpdateConfiguration()호출 시 시스템이updateConfiguration(using:)을 호출title,body를 가지고MyCellConfiguration을 만든 뒤contentConfiguration에 설정- 시스템은 이 설정을 보고 자동으로
CellConfigurationView를 생성 및 삽입
4. CellConfigurationListViewController.swift
func tableView(_ tableView: UITableView, cellForRowAt indexPath: IndexPath) -> UITableViewCell {
    guard let cell = tableView.dequeueReusableCell(withIdentifier: "CellConfigTableViewCell", for: indexPath) as? CellConfigTableViewCell else {
        return UITableViewCell()
    }

    let cellData = dummySections[indexPath.section].rows[indexPath.row]
    cell.title = cellData.title
    cell.body = cellData.body
    return cell
}
- 더미 데이터를 불러와
title,body만 할당하면 자동으로 UI가 구성된다 - 직접적으로
UILabel에 접근하거나cell.subviews를 조작하지 않아도 된다
전체 예제 코드
1. MyCellConfiguration.swift
import UIKit

// 커스텀 셀에 대한 설정
struct MyCellConfiguration: UIContentConfiguration, Hashable {

    var title: String = ""
    var body: String = ""

    // 보여줄 화면
    // UIView이면서 UIContentView인 애를 반화내라
    func makeContentView() -> any UIView & UIContentView {
        return CellConfigurationView(config: self)
    }


    /// 셀 상태가 변경되면 발동
    /// - Parameter state: 셀 상태
    /// - Returns: 셀 설정 자체
    func updated(for state: any UIConfigurationState) -> MyCellConfiguration {
        if let state = state as? UICellConfigurationState {
            var updatedConfig = self

            if state.isSelected {
                updatedConfig.title = "선택됨: " + updatedConfig.title
            }
            return updatedConfig
        }
        return self
    }
}
2. CellConfigurationView.swift
import UIKit

// 뷰 안에 컨텐츠 Config를 가지고 있는 뷰
class CellConfigurationView: UIView, UIContentView {

    // 여러 데이터를 가진 덩어리
    fileprivate var customConfiguration: MyCellConfiguration!

    // 데이터와 UI를 연결
    fileprivate func applyConfigAndChangeUI(_ newConfiguration: MyCellConfiguration) {
        self.customConfiguration = newConfiguration
        titleLabel.text = newConfiguration.title
        bodyLabel.text = newConfiguration.body
    }

    var configuration: UIContentConfiguration {
        get { customConfiguration }
        set {
            if let newConfiguration = newValue as? MyCellConfiguration {
                applyConfigAndChangeUI(newConfiguration)
            }
        }
    }

    init(config: MyCellConfiguration) {
        super.init(frame: .zero)
        configureUI()
        applyConfigAndChangeUI(config)
    }

    lazy var titleLabel: UILabel = {
        let label = UILabel()
        label.translatesAutoresizingMaskIntoConstraints = false
        label.text = "타이틀 라벨타이틀 라벨타이틀 라벨타이틀 라벨타이틀 라벨"
        label.numberOfLines = 1
        label.textColor = .white
        label.font = UIFont.systemFont(ofSize: 14, weight: .bold)
        return label
    }()

    lazy var bodyLabel: UILabel = {
        let label = UILabel()
        label.translatesAutoresizingMaskIntoConstraints = false
        label.text = "바디 라벨바디 라벨바디 라벨바디 라벨바디 라벨바디 라벨바디 라벨바디 라벨바디 라벨바디 라벨바디 라벨바디 라벨바디 라벨바디 라벨바디 라벨바디 라벨바디 라벨바디 라벨바디 라벨바디 라벨바디 라벨바디 라벨바디 라벨바디 라벨바디 라벨바디 라벨바디 라벨"
        label.numberOfLines = 0
        label.textColor = .white
        label.font = UIFont.systemFont(ofSize: 12, weight: .regular)
        return label
    }()

    fileprivate func configureUI() {
        self.backgroundColor = .systemBlue

        // 타이틀 라벨 설정
        self.addSubview(self.titleLabel)
        NSLayoutConstraint.activate([
            titleLabel.topAnchor.constraint(equalTo: self.topAnchor, constant: 10),
            titleLabel.leadingAnchor.constraint(equalTo: self.leadingAnchor, constant: 10),
            titleLabel.trailingAnchor.constraint(equalTo: self.trailingAnchor, constant: -10),
        ])

        // 바디 라벨 설정
        self.addSubview(self.bodyLabel)
        NSLayoutConstraint.activate([
            bodyLabel.topAnchor.constraint(equalTo: self.titleLabel.bottomAnchor, constant: 10),
            bodyLabel.leadingAnchor.constraint(equalTo: self.leadingAnchor, constant: 10),
            bodyLabel.trailingAnchor.constraint(equalTo: self.trailingAnchor, constant: -10),
            bodyLabel.bottomAnchor.constraint(equalTo: self.bottomAnchor, constant: -10)
        ])
    }

    required init?(coder: NSCoder) {
        super.init(coder: coder)
    }

    override func layoutSubviews() {
        super.layoutSubviews()
    }
}

#if DEBUG
import SwiftUI

struct CellConfigurationView_PreviewProvider_Previews: PreviewProvider {
    static var previews: some View {
        CellConfigurationView(config: MyCellConfiguration(title: "오늘도 코딩", body: "바디부분")).getPreview()
            .previewLayout(.fixed(width: 200, height: 100))
    }
}
#endif
3. CellConfigTableViewCell.swift
import UIKit

// 기존 테이블뷰 셀은 데이터만 신경쓰면 됨
class CellConfigTableViewCell: UITableViewCell {

    // 데이터 변경시 UI 변경해라
    var title: String = "" {
        didSet {
            setNeedsUpdateConfiguration()
        }
    }

    var body: String = "" {
        didSet {
            setNeedsUpdateConfiguration()
        }
    }

    override func updateConfiguration(using state: UICellConfigurationState) {
        super.updateConfiguration(using: state)

        var contentConfig = MyCellConfiguration().updated(for: state)
        contentConfig.title = title
        contentConfig.body = body
        self.contentConfiguration = contentConfig
    }

    override func layoutSubviews() {
        super.layoutSubviews()
    }
}

#if DEBUG
import SwiftUI

struct CellConfigTableViewCell_PreviewProvider_Previews: PreviewProvider {
    static var previews: some View {
        CodeCell().getPreview()
            .previewLayout(.fixed(width: 200, height: 100))
    }
}
#endif
4. CellConfigurationListViewController.swift
import UIKit

class CellConfigurationListViewController: UIViewController {

    @IBOutlet weak var myTableView: UITableView!
    var dummySections: [DummySection] = DummySection.getDumies(10)

    override func viewDidLoad() {
        configureTableView()
    }

    fileprivate func configureTableView() {

        // CodeCell에서는 이 줄만 필요
        self.myTableView.register(CellConfigTableViewCell.self, forCellReuseIdentifier: "CellConfigTableViewCell")

        self.myTableView.dataSource = self
        self.myTableView.delegate = self
    }
}


/// UITableView의 데이터 관리 역할을 담당
extension CellConfigurationListViewController: UITableViewDataSource {

    /// 섹션이 여러개일때만 사용
    /// 섹션의 타이틀 설정
    func tableView(_ tableView: UITableView, titleForHeaderInSection section: Int) -> String? {
        return "헤더: " + dummySections[section].title
    }

    func tableView(_ tableView: UITableView, titleForFooterInSection section: Int) -> String? {
        return "푸터: " + dummySections[section].title
    }

    /// 섹션이 여러개일때만 사용
    /// 현재 섹션이 몇개인지
    func numberOfSections(in tableView: UITableView) -> Int {
        return dummySections.count
    }

    /// 하나의 섹션에 몇개의 rows가 있냐
    func tableView(_ tableView: UITableView, numberOfRowsInSection section: Int) -> Int {
        return dummySections[section].rows.count
    }

    /// 각 셀에 대한 내용을 구성하여 반환 -> 셀의 종류를 정하기 - 테이블뷰 셀을 만들어서 반환해라
    /// - indexPath: 셀의 위치를 나타내는 인덱스 경로
    /// - returns: 구성된 UITableViewCell 객체
    func tableView(_ tableView: UITableView, cellForRowAt indexPath: IndexPath) -> UITableViewCell {
        /// 기본 스타일의 셀 생성 (textLabel과 detailTextLabel 포함)
        /// let cell = UITableViewCell(style: .subtitle, reuseIdentifier: "MyCell")

        // [guard let] 방식
        guard let cell = tableView.dequeueReusableCell(withIdentifier: "CellConfigTableViewCell", for: indexPath) as? CellConfigTableViewCell else {
            return UITableViewCell()
        }

        let sectionData: DummySection = dummySections[indexPath.section]

        let cellData: DummyData = sectionData.rows[indexPath.row]

        /// 셀의 주 텍스트를 더미 데이터에서 가져오기
        // cell.titleLabel.text = cellData.title

        /// 셀의 서브 타이틀 설정
        // cell.bodyLabel.text = cellData.body

        //cell.detailTextLabel?.numberOfLines = 0

        // 여기서는 UI에 접근하는게 아니라 Cell이 가지고 있는 멤버변수 데이터 자체에 접근
        cell.title = cellData.title
        cell.body = cellData.body
        return cell
    }
}

/// 이벤트 관련 부분 - 셀 선택 등 사용자 인터랙션(이벤트) 관련 처리
extension CellConfigurationListViewController: UITableViewDelegate {
    /// 사용자가 특정 셀을 선택했을 때 호출되는 메서드
    /// - Parameters:
    ///   - tableView: 이벤트가 발생한 테이블 뷰
    ///   - indexPath: 선택된 셀의 위치
    func tableView(_ tableView: UITableView, didSelectRowAt indexPath: IndexPath) {
        print(#fileID, #function, #line, "- indexPath: \(indexPath.row)")
    }
}